SMTP server
SMTP Server: Outgoing mail server address.
Common examples:
- Gmail:
smtp.gmail.com - Outlook:
smtp-mail.outlook.com - Yahoo:
smtp.mail.yahoo.com - Own server:
mail.yourdomain.com
Format: Plain text (example: smtp.gmail.com)
Email Configuration is where you configure the SMTP server that ShipEdge uses to send automated emails. This configuration is essential for the system to send notifications, confirmations, alerts, and other automated emails to your customers and users.
Without correct SMTP configuration, automated emails will not be sent and you’ll lose important communication with your customers.
Configure the SMTP server so all system automated emails are sent correctly to your customers and users.
Ensure important notifications (orders, inventory, shipments) arrive on time to the correct recipients.
Define the name and email address from which emails are sent to maintain brand consistency.
Test the SMTP configuration before activating it to verify everything works correctly.
Navigate to System Config
Go to the main menu and click System Config.
Select Email
Click Email from the System Config submenu.
The page opens with two tabs:
Configure the SMTP Server
If it’s the first time, you’ll see a form to configure the SMTP server. If already configured, you’ll see fields to update the configuration.
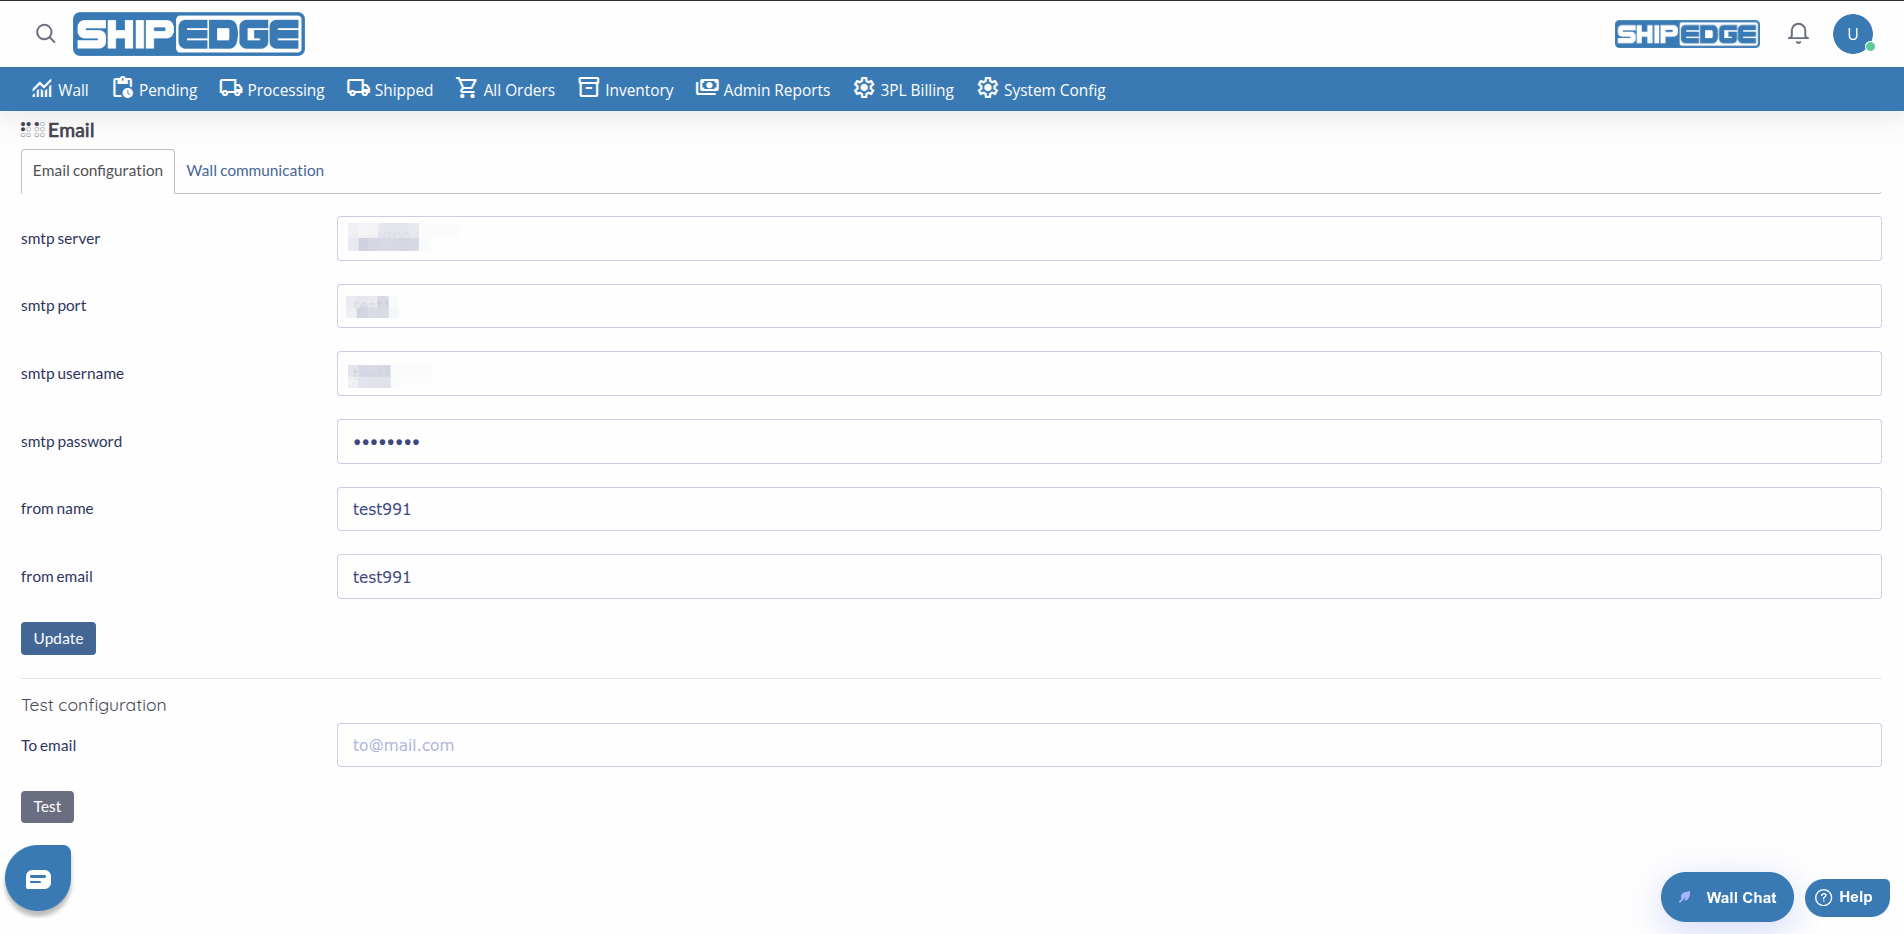
The “Email configuration” tab contains all fields necessary to configure the SMTP server:
SMTP server
SMTP Server: Outgoing mail server address.
Common examples:
smtp.gmail.comsmtp-mail.outlook.comsmtp.mail.yahoo.commail.yourdomain.comFormat: Plain text (example: smtp.gmail.com)
SMTP port
SMTP Port: Port used by the SMTP server for secure connections.
Common ports:
Format: Number (example: 465)
SMTP username
SMTP Username: Username or email address for authentication.
Examples:
youremail@gmail.comyouremail@outlook.comuser@yourdomain.comFormat: Email address or username
SMTP password
SMTP Password: Password for SMTP server authentication.
Note for Gmail: If you use Gmail, you need to generate an “App Password” instead of your normal password. Go to your Google account → Security → App passwords.
From name
Sender Name: Name that appears as sender in sent emails.
Examples:
This is the name recipients will see in their inbox.
From email
Sender Email: Email address from which emails are sent.
Format: Must be a valid email address (example: noreply@yourdomain.com)
Important: This address must be authorized on your SMTP server. Some servers require it to match the SMTP username.
Access Email Configuration
Go to System Config > Email. If it’s the first time, you’ll see an empty form.
Complete SMTP Fields
Enter your SMTP server information:
smtp.gmail.com)465 for SSL)Configure Sender
Define how emails will appear:
Save Configuration
Click Update to save the configuration. The system will save the values and display them in the edit form.
Test Configuration
Use the “Test configuration” function to verify everything works correctly before using the system in production.
Access Email Configuration
Go to System Config > Email. If already configured, you’ll see fields with current values.
Modify Necessary Fields
Update any field you need to change:
Save Changes
Click Update to save modifications. Changes will apply immediately.
Test New Configuration
Use the test function to verify the new configuration works correctly.

After configuring or updating SMTP, you should always test that it works:
Locate “Test configuration” Section
At the bottom of the Email Configuration form, you’ll find the “Test configuration” section.
Enter Test Email
In the To email field, enter an email address to which you want to send the test email (can be your own email).
Click “Test”
Click the Test button. The system will attempt to send a test email using the current SMTP configuration.
Verify Result
You’ll see a message indicating if the email was sent correctly:
Check Your Inbox
If the message indicates success, check the inbox (and spam) of the test email to confirm you received the email.
The second tab “Wall communication” controls email notifications related to the Wall (internal communication system):
Send emails
Send Emails: Controls when emails related to the Wall are sent.
Options:
Recommendation: Use “New posts and replies” to keep users informed of all relevant activity.
Notification emails
Notification Emails: Email addresses that will receive Wall notifications.
Format: You can enter multiple addresses separated by commas (example: admin@company.com, manager@company.com)
Usage: These addresses will receive emails when there’s new activity on the Wall according to the “Send emails” configuration.
Open “Wall communication” tab
Click the Wall communication tab (second tab on the page).
Select Sending Option
Choose when you want emails to be sent:
Enter Notification Addresses
In the Notification emails field, enter the email addresses that should receive notifications (separated by commas if multiple).
Save Configuration
Click Save (first time) or Update (if already configured) to save changes.
Recommended configuration:
smtp.gmail.com465 (SSL) or 587 (STARTTLS)How to get app password:
Recommended configuration:
smtp-mail.outlook.com or smtp.office365.com587 (STARTTLS)General configuration:
465 (SSL) or 587 (STARTTLS)Consult with your hosting provider to get exact values.
Always use encrypted ports (465 or 587) to protect your credentials and sent emails. Avoid port 25 without encryption.
Always test configuration after making changes, especially if you update the password or change servers.
For Gmail and some providers, use app passwords instead of your main password. This is more secure and avoids authentication problems.
Make sure the “From email” is a valid and authorized address on your SMTP server. Some servers reject emails if it doesn’t match the SMTP username.
After configuring, monitor that automated emails are being sent correctly. Check recipient inboxes and spam folders.
Save SMTP configuration information in a secure place (not in public documentation). This helps if you need to reconfigure later.
Possible Causes:
Solution:
Possible Causes:
Solution:
Possible Causes:
Solution:
Possible Causes:
Solution:
Can I use any SMTP server?
Yes, as long as you have correct credentials and the server allows external connections. Some servers require additional configuration (IP whitelist, etc.).
Do I need to change configuration if I change email providers?
Yes, you need to update SMTP server, port, username, and password when changing providers. Don’t forget to test the new configuration.
What happens if I don’t configure Email Configuration?
Without SMTP configuration, the system won’t be able to send automated emails. Notifications, confirmations, and alerts won’t be sent to recipients.
Can I use multiple SMTP servers?
Current configuration allows only one SMTP server at a time. All automated emails will use the same configuration.
Do changes apply immediately?
Yes, changes are saved immediately when you click “Update” or “Save”. Next automated emails will use the new configuration.
What is an app password?
An app password is a special password generated by your email provider (like Gmail) that allows external applications to access your account without using your main password. It’s more secure and often required for services like Gmail.
Explore Related Features: