Detailed Analysis
Get detailed information about orders, inventory, expenses, and transactions to make informed decisions.
Reports lets you generate detailed reports about your warehouse operations, including shipped orders, inventory, shipping expenses, transactions, and more. You can generate reports immediately or schedule them to run automatically at specific times.
Get detailed information about orders, inventory, expenses, and transactions to make informed decisions.
Access more than 30 different types of standard and advanced reports according to your specific needs.
Filter reports by account, date range, order status, and other specific criteria to get exactly what you need.
Schedule reports to generate automatically at specific times and receive them by email.
All reports are generated in CSV format for easy analysis in Excel or other tools.
Access a complete history of all generated reports for future reference.
You can access Reports from:
Reports includes two main categories:
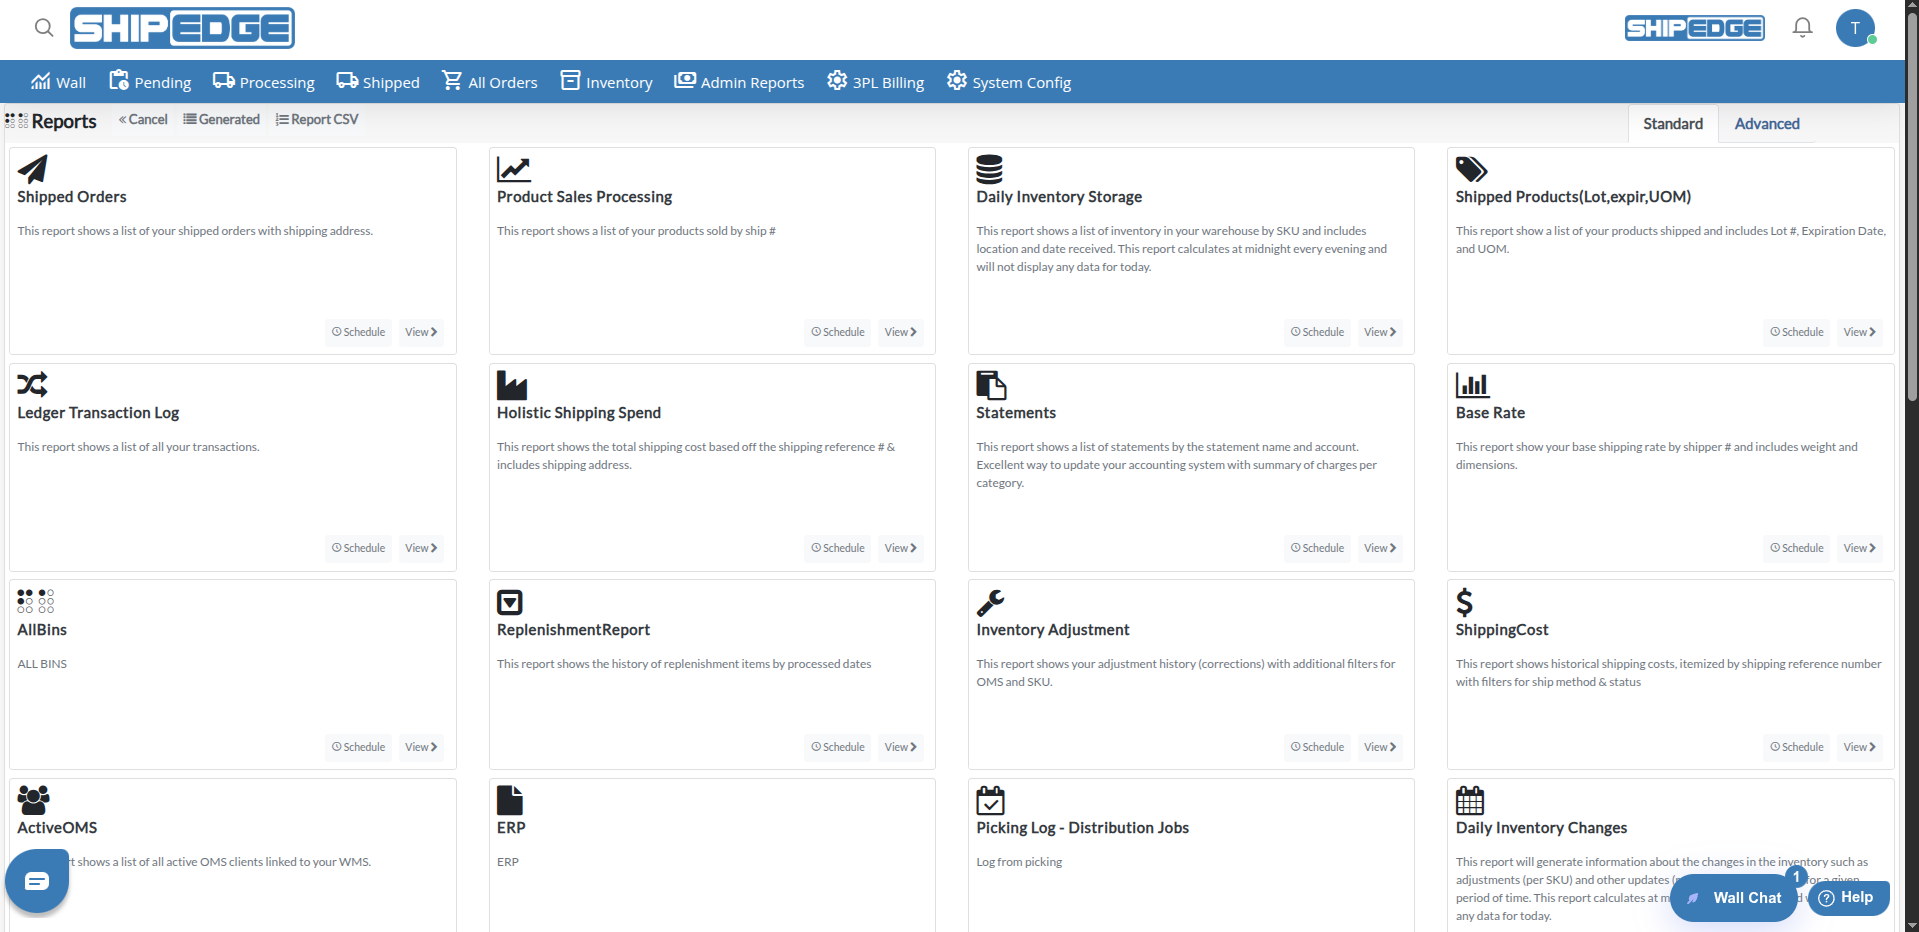
Standard reports are available to all users and don’t require special configuration. They include:
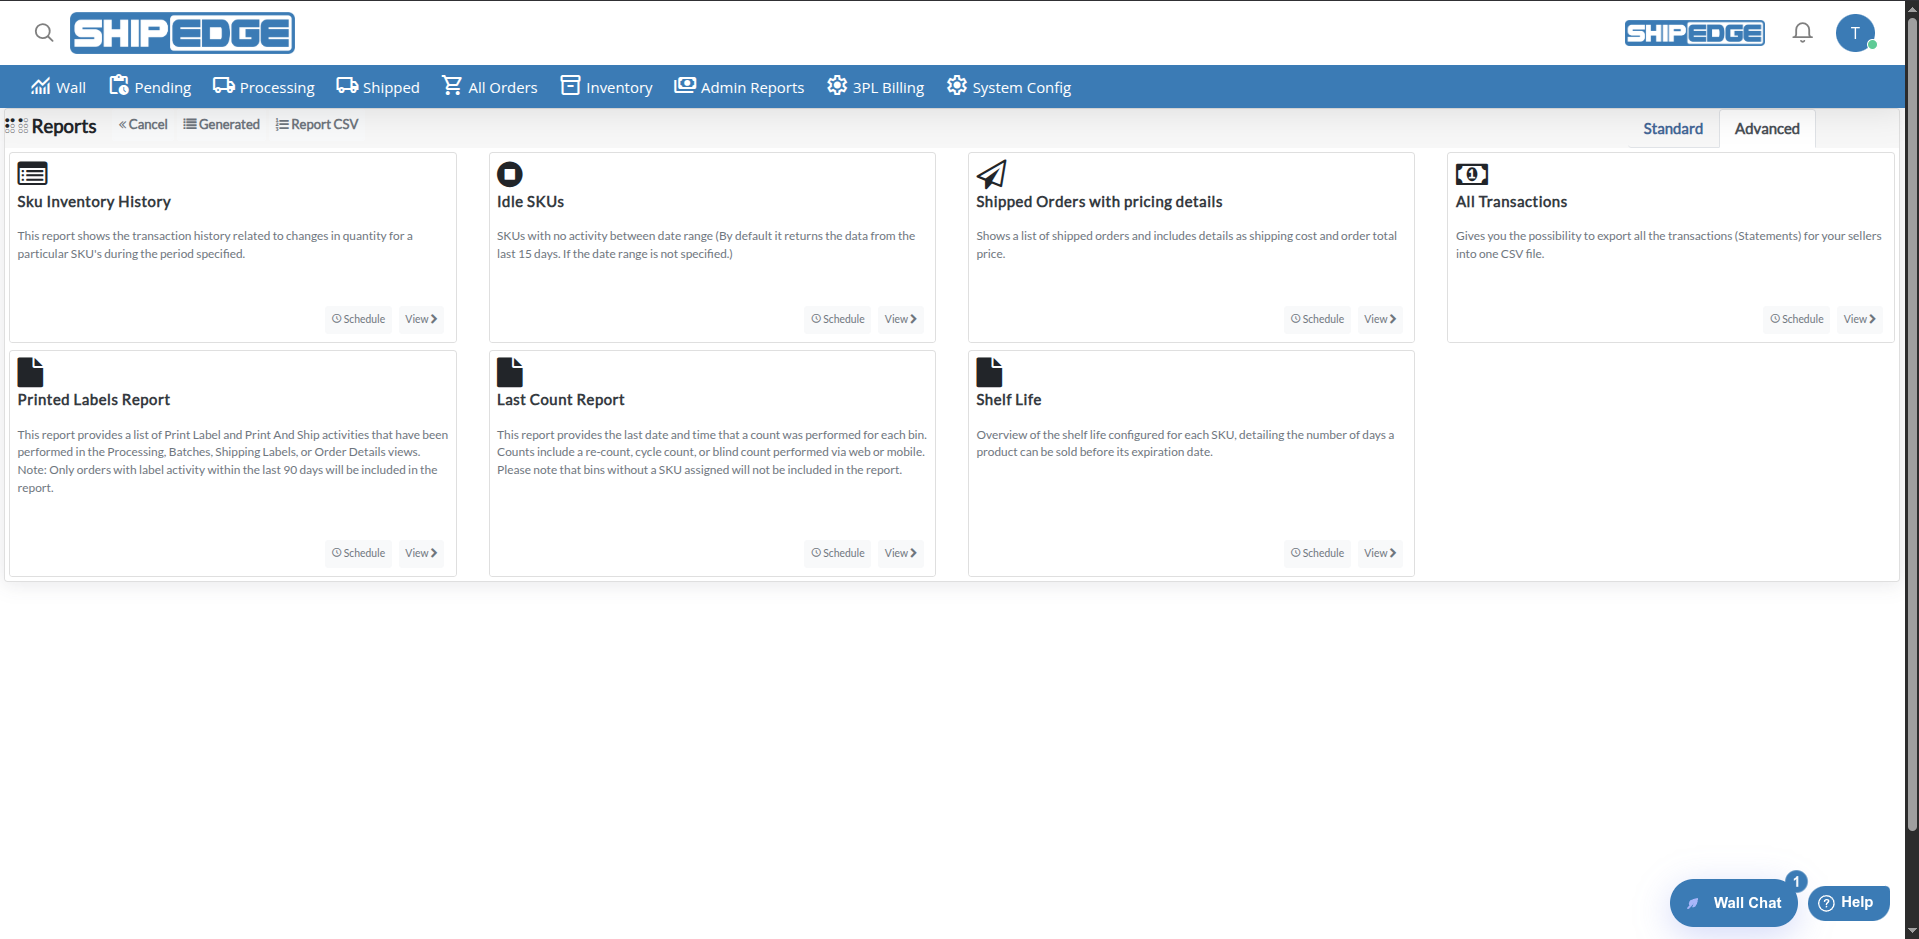
Advanced reports require a configured database replica server. If you don’t have access to these reports, you’ll see a message indicating that additional configuration is required.
Access Reports
Go to Admin Reports > Reports.
Select report type
On the main page, you’ll see cards with all available reports. Each card shows:
Click View or the report name
This will open a modal with report parameters.
Select account (if applicable)
If your user level allows, select the account for which you want to generate the report. You can select “ALL” for all accounts or a specific account.
Select date range
Use the date range selector to choose:
Configure additional filters (if applicable)
Depending on report type, you can configure additional filters such as:
Review configuration
Make sure all parameters are correct before generating the report.
Generate report
Click Generate to create the report immediately. The system will process the report and it will be available in the generated reports list.
You can schedule reports to generate automatically:
Access the report
Go to Reports and select the report you want to schedule.
Click Schedule
On the report card, click the Schedule button (clock icon).
Configure parameters
Complete the same parameters as for generating a manual report:
Configure frequency
Use the cron selector to configure when the report will run:
Select date range for scheduling
Choose the time period that each report execution will cover:
Save schedule
Click Schedule to save the schedule. The report will run automatically according to the configured frequency.
You can view all reports you’ve generated:
Access Generated
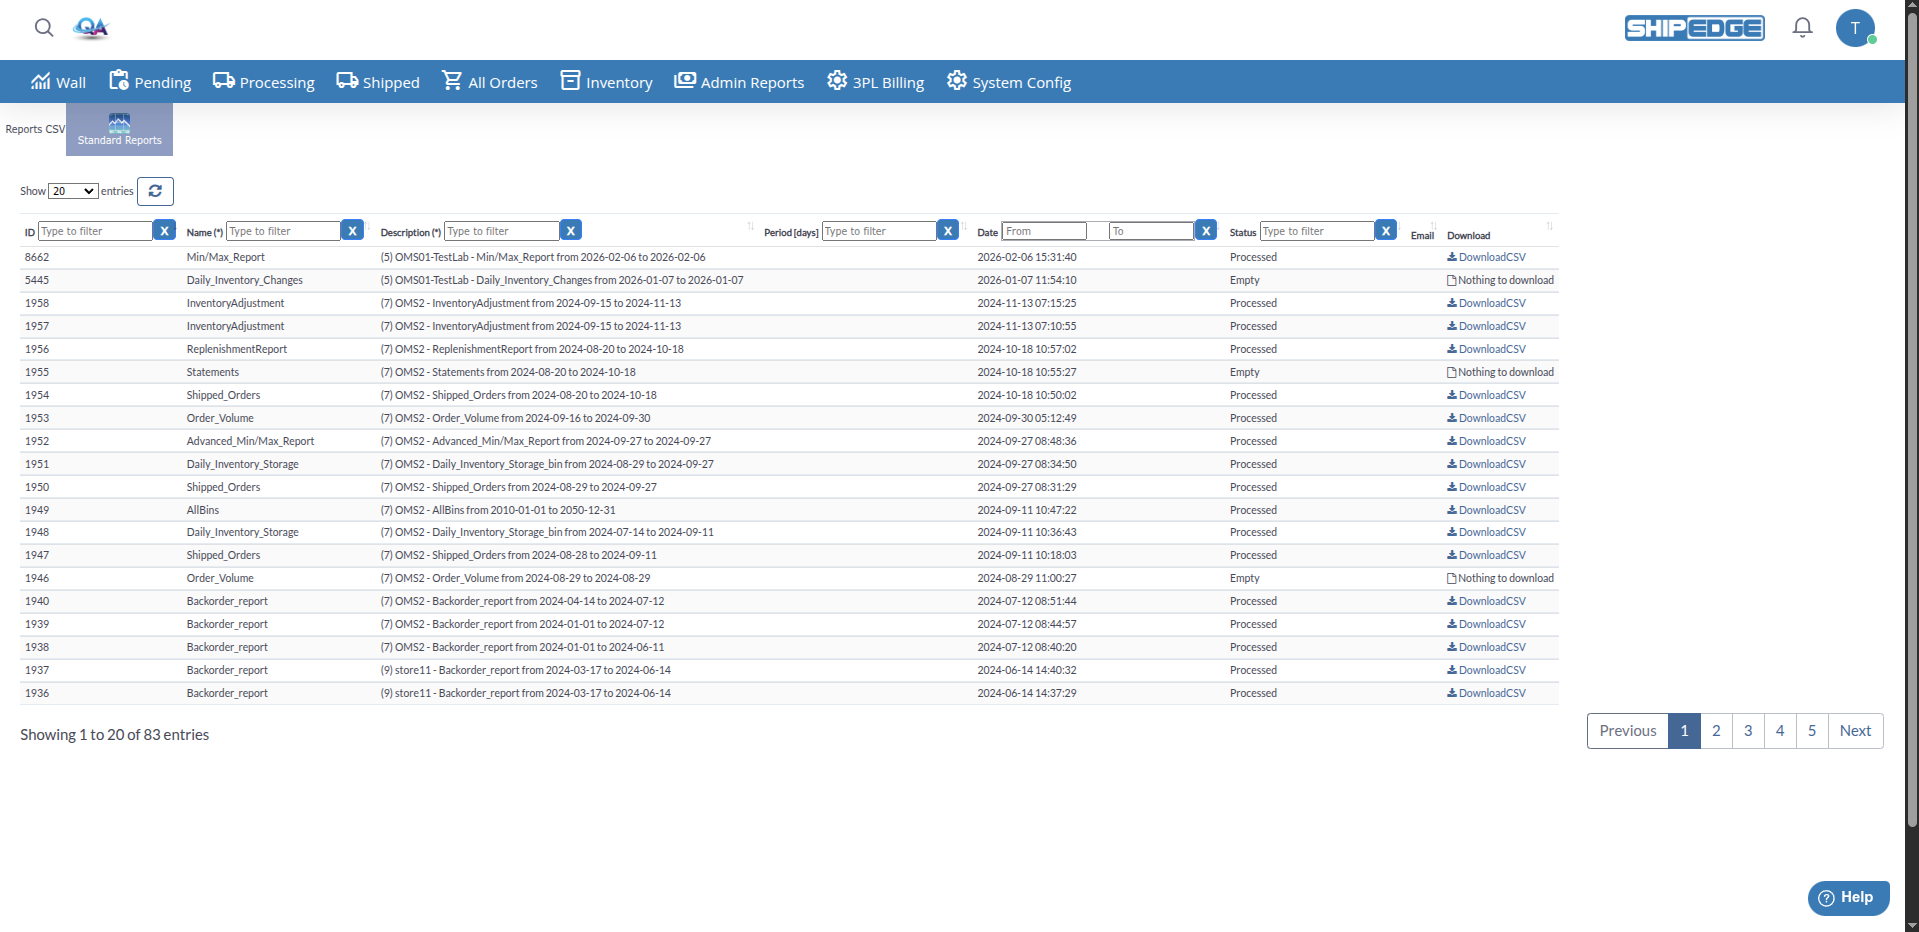
On the Reports page, click the Generated button at the top.
Review the list
You’ll see a table with all generated reports, showing:
Filter reports
Use table filters to search for specific reports by name, description, date, or status.
Download report
Once status is “Completed”, you can download the report CSV file.
Reports can have different statuses:
Reports are processed in the background, so it may take a few minutes depending on report size and complexity.
Depending on report type, you can use different types of filters:
=, >, >=, <, <=, BetweenSome reports have special configurations:
You can view and manage reports you’ve scheduled:
Identify scheduled reports
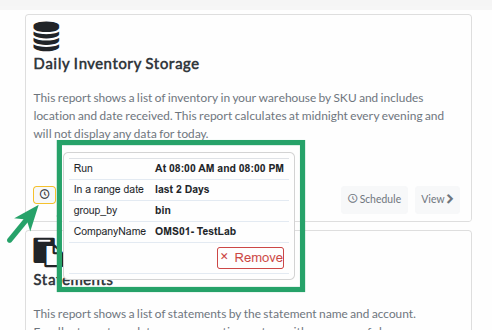
On the report card, you’ll see badges with clock icons indicating scheduled reports.
View schedule details
Hover over the scheduled report badge to see:
Remove schedule
In the tooltip that appears when hovering, click Remove to remove the report schedule.
Select date ranges that are relevant for your analysis. Very large ranges can generate very large and slow reports.
Schedule reports you need regularly (daily, weekly) to automate your workflow.
Make sure report status is “Completed” before attempting to download it.
Take advantage of available filters to get more precise and useful reports instead of large generic reports.
Report names include parameters. Use this to easily identify what each report contains.
Download and save important reports regularly to maintain a history outside the system.
If you don’t see certain reports or can’t generate reports for certain accounts, verify your permissions with the administrator.
Periodically review your scheduled reports to ensure they remain useful and up to date.
Problem: You click Generate but the report doesn’t create or shows an error.
Solution:
Problem: Report remains in “Pending” status and doesn’t complete.
Solution:
Problem: You receive a message indicating only one schedule is allowed.
Solution:
Problem: You see a message indicating advanced reports require a replica server.
Solution:
Problem: Report generates but doesn’t contain data.
Solution:
Problem: Download button doesn’t work or file doesn’t download.
Solution: