Detailed Time Tracking
Log start and end hours for each user working on a project, with optional comments to document work done.
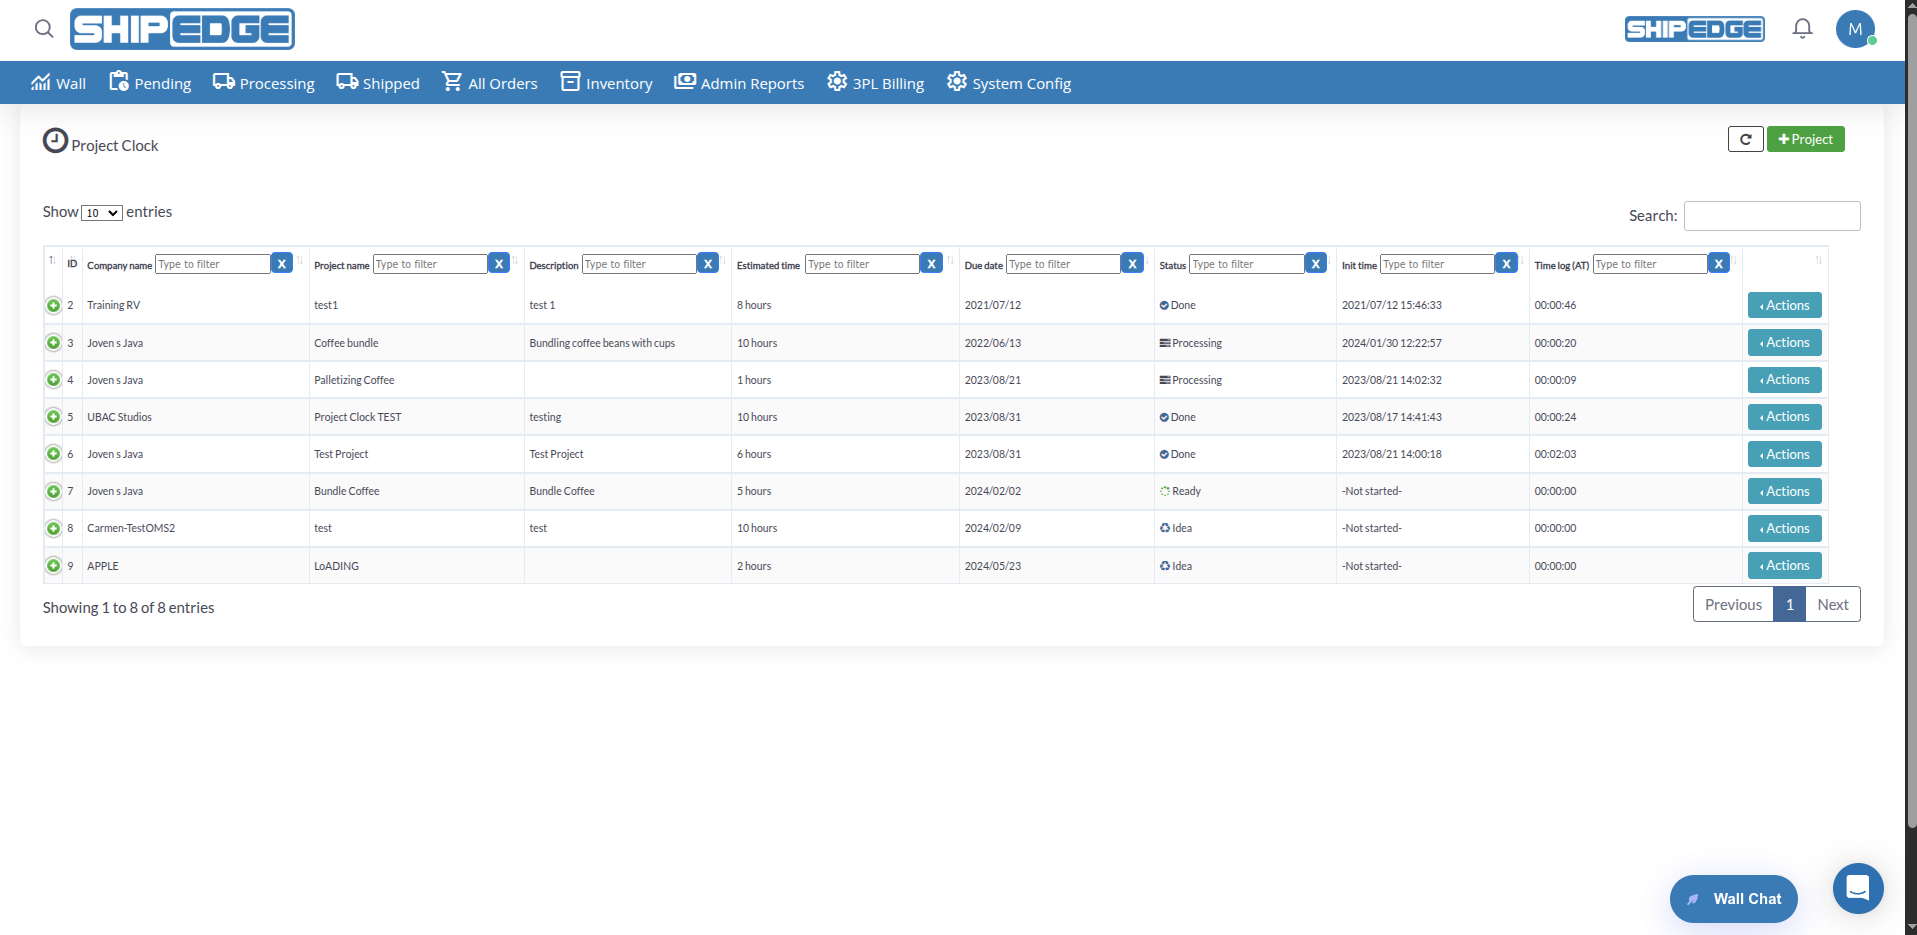
Project Clock is a time tracking tool that lets you create projects, log hours worked by warehouse users, and bill clients for work done on specific projects.
This tool is useful for special projects, custom services, or any work that requires detailed tracking of time invested. It helps you maintain accurate records of who worked on which project and how much time was dedicated, facilitating accurate billing.
Log start and end hours for each user working on a project, with optional comments to document work done.
Create projects with name, description, estimated time, and due date to organize warehouse work.
Assign warehouse users to projects and log their worked time individually for each project.
Manage projects through statuses: Idea, Ready, Processing, and Done to maintain an organized workflow.
Close completed projects and automatically bill worked time with custom costs and prices.
View total accumulated time worked on each project and the start date of the first time record.
You can access Project Clock from:
Open Project Form
Click the Project button at the top right of the page.
Complete Project Information
Complete the following fields:
Save the Project
Click Save to create the project. The project will be created with “Idea” status.
Projects go through different statuses during their lifecycle:
Newly created project, not yet approved to start. You can edit it or approve it to change its status to “Ready”.
Approved project ready to start. Users can begin logging worked time.
Project in progress with users logging worked time. You can close it when complete.
Completed and invoiced project. No more changes can be made.
To change a project from “Idea” to “Ready” status:
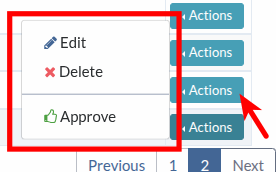
Open Actions Menu
Click the Actions button in the row of the project you want to approve.
Select Approve
Click Approve in the dropdown menu.
Confirm Approval
Confirm the action in the confirmation dialog. The project status will change to “Ready”.
Warehouse users can log worked time on projects. Time logging is typically done from the mobile app, but you can also manage it from the web interface:
Expand Project Details
Click the expansion icon (first column) in the project row to see time records.
View Time Records
A table will show all time records for the project, including:
Edit Time Records (if necessary)
Click on any editable field to modify it:
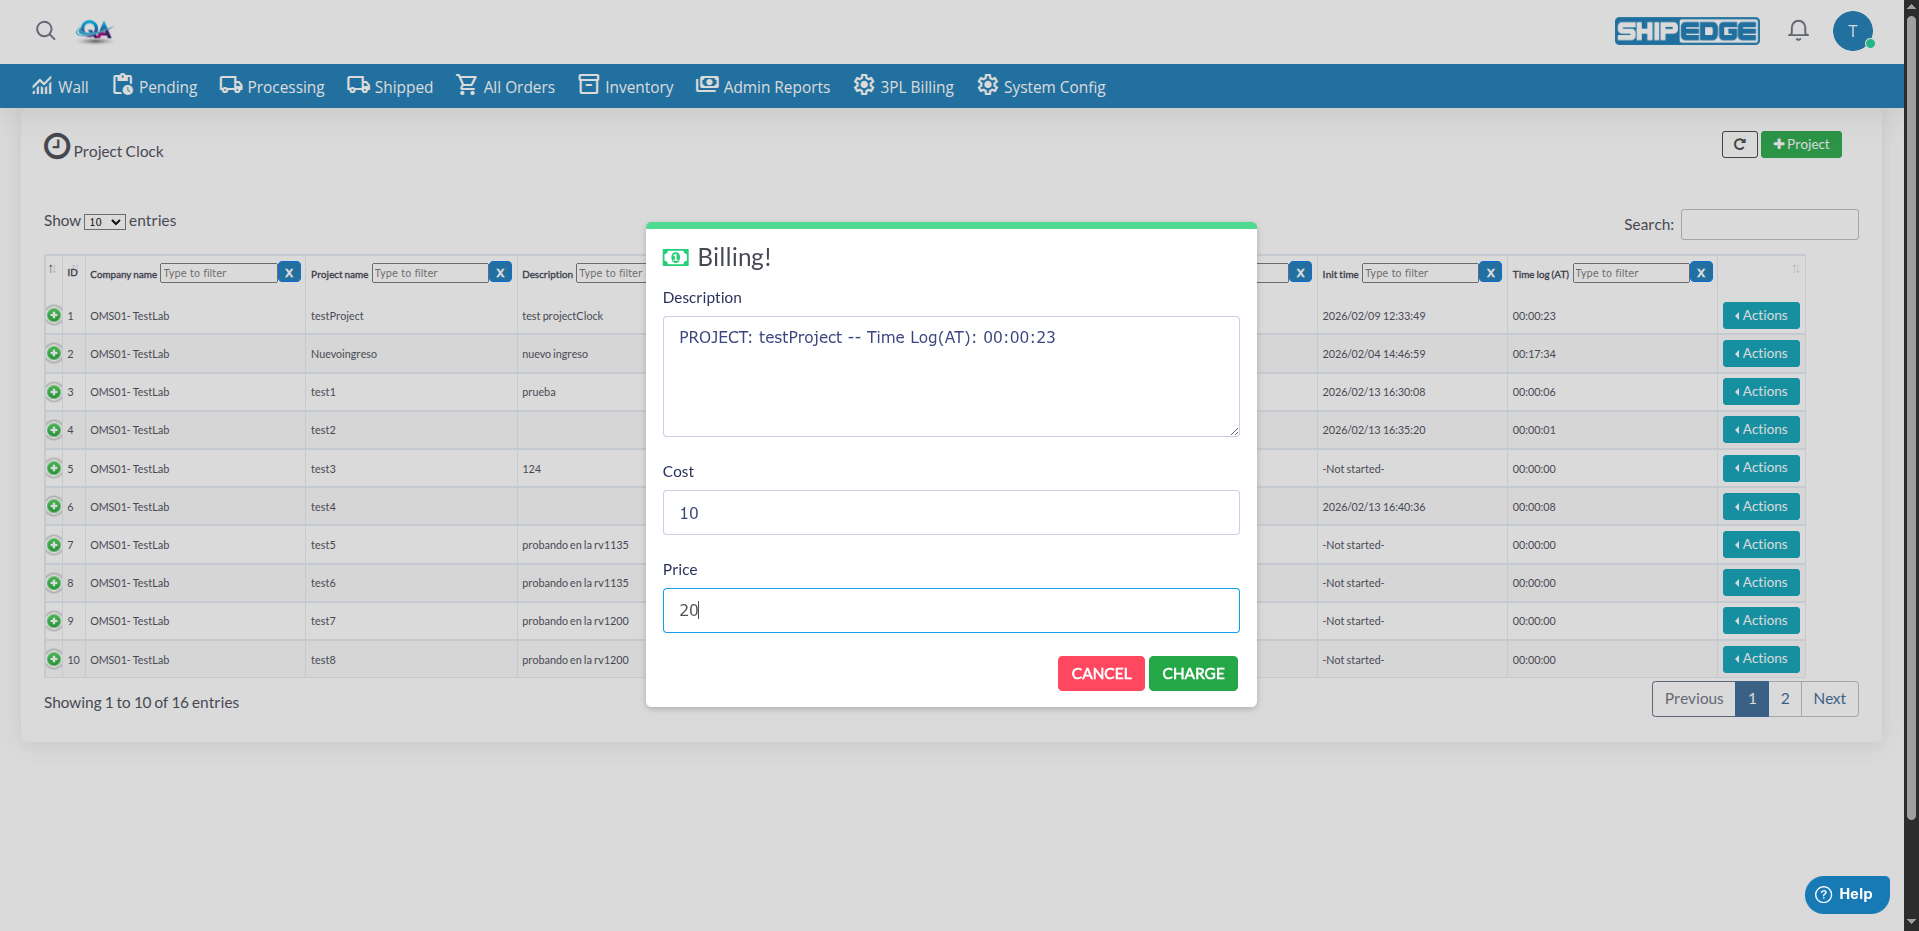
When a project is complete and all time records are correct, you can close and bill it:
Verify Time Records
Make sure all time records have complete start and end times. The system will verify this automatically.
Open Actions Menu
Click Actions in the row of the project with “Processing” status.
Select Close
Click Close in the dropdown menu.
Complete Billing Information
If all records are complete, a billing form will open:
Confirm Billing
Click charge to confirm. The system will:
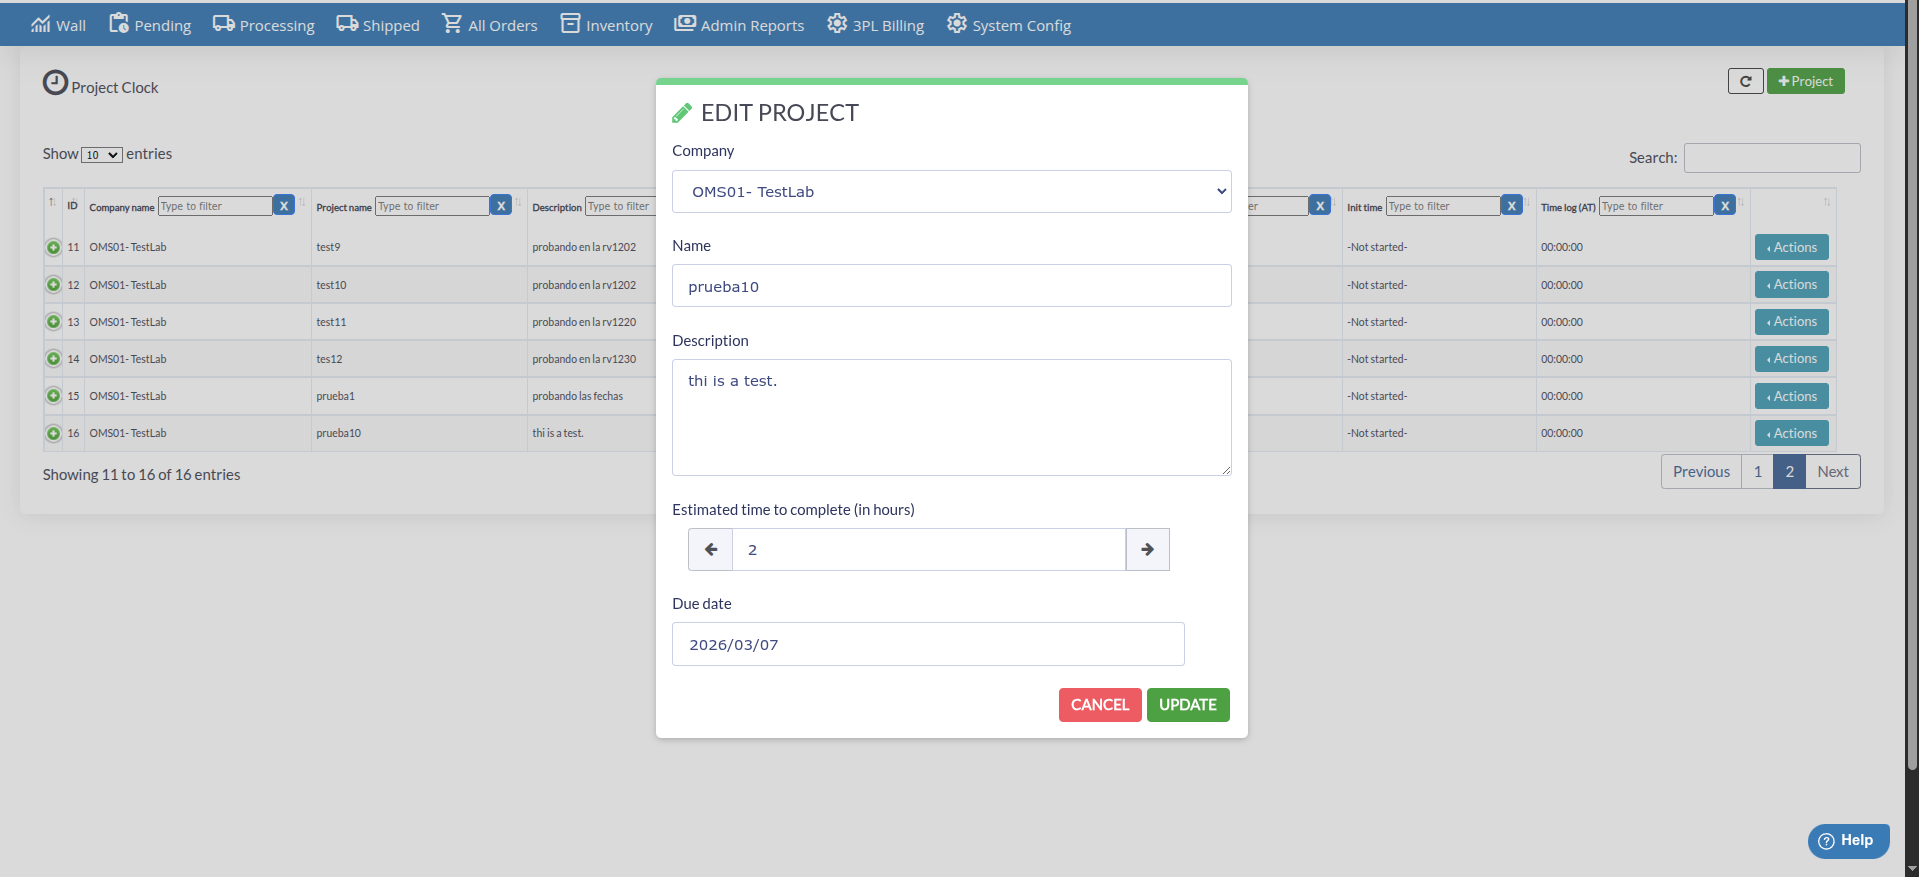
You can edit projects that aren’t yet in “Done” status:
Open Actions Menu
Click Actions in the row of the project you want to edit.
Select Edit
Click Edit in the dropdown menu.
Modify Fields
Update any project field:
Save Changes
Click UPDATE to save changes.
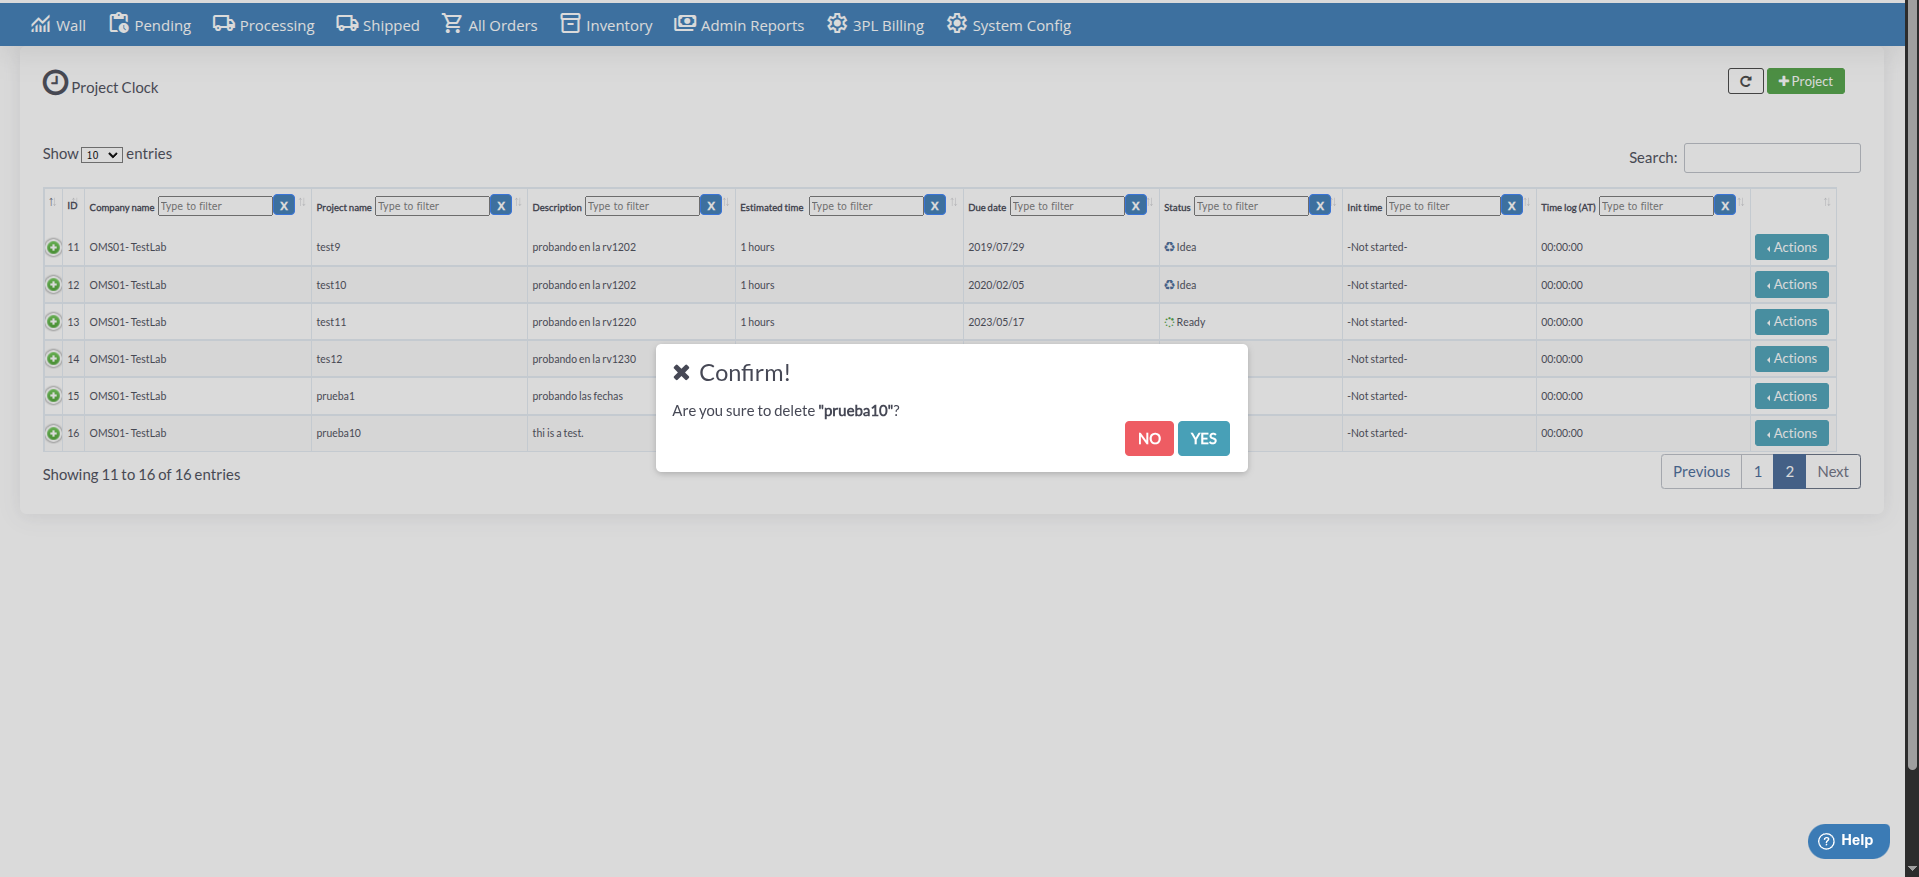
You can delete projects you no longer need:
Open Actions Menu
Click Actions in the row of the project you want to delete.
Select Delete
Click Delete in the dropdown menu.
Confirm Deletion
Confirm deletion in the dialog. The project and all its time records will be permanently deleted.
The main table shows the following information for each project:
You can search and filter projects using filters at the top of each column:
Use accurate estimated times when creating projects to help plan resources and meet due dates.
Add descriptive comments in time records to document what work was done during each session.
Review time records periodically to ensure all users are correctly logging their worked hours.
Verify that all time records have start and end times before attempting to close a project to avoid errors.
Write clear and specific project descriptions to facilitate identification and management of multiple projects.
Close and bill projects as soon as they’re complete to maintain healthy cash flow and updated records.
Problem: The “Close” button doesn’t appear or an error appears when trying to close.
Solution:
Problem: When expanding a project, time records don’t appear.
Solution:
Problem: When clicking “Stop time”, an error message appears.
Solution: