Centralized View
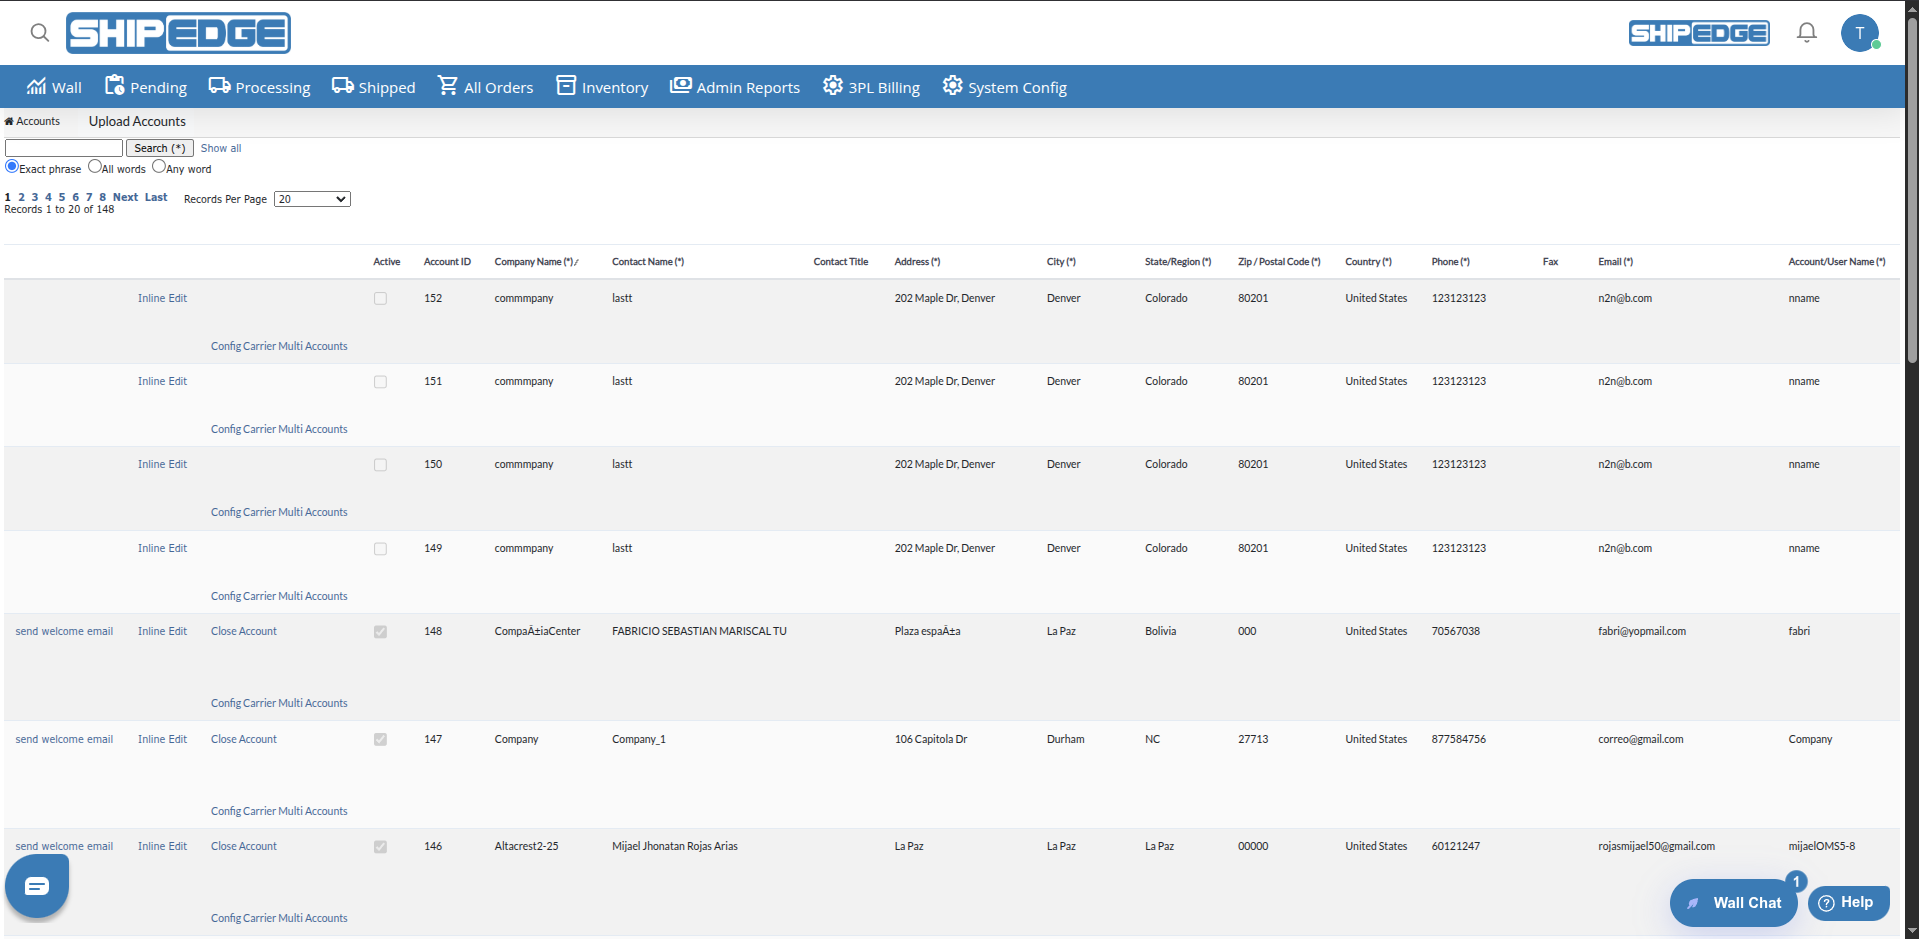
See all OMS accounts in a single table with complete contact, status, and configuration information.
OMS Accounts is your administration center for managing all Order Management System (OMS) accounts. From here you can see complete information for each account, edit data directly in the table, close accounts, send welcome emails, and configure payment methods. This view is essential for warehouse administrators who need to manage multiple client accounts.
See all OMS accounts in a single table with complete contact, status, and configuration information.
Edit account information directly in the table without needing to open separate pages.
Activate, deactivate, or close accounts as needed. Control access and status of each OMS account.
Search accounts by company name, contact, address, or any field. Filter results quickly.
Perform actions like sending welcome emails, configuring multi-account carriers, and deleting data when necessary.
Access all details of each account: complete address, contact information, activation status, and more.
You can access OMS Accounts from:
The table shows the following columns for each OMS account:
Access OMS Accounts
Navigate to Admin Reports > OMS Accounts.
Review the table
The table shows all OMS accounts with their main fields. By default it shows 20 records per page.
Navigate between pages
Use pagination controls at the bottom to navigate between result pages. You can go to First, Previous, Next, or Last.
Adjust records per page
Select the number of records you want to see per page from the Records Per Page dropdown menu. Available options: 10, 20, 50, 100, 200, 500, or All Records.
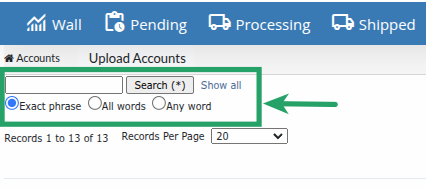
Use basic search
At the top of the table, find the search field with the Search (*) button.
Enter your search term
Type the text you want to search. The search looks in the following fields:
Select search type
Choose how you want your search interpreted:
Execute search
Click Search (*) to execute the search. Results will be highlighted in the table.
Clear search
Click Show all to clear the search and see all records again.
Enable edit mode
In the row of the account you want to edit, click the Inline Edit link.
Modify fields
Editable fields will become text fields. You can modify:
Validate data
Make sure that:
Save changes
Click Update to save changes. If there are validation errors, error messages will be shown.
Cancel editing
If you don’t want to save changes, click Cancel to return to view mode.
Locate active account
You can only send welcome emails to accounts that are active.
Click the link
In the actions column, click send welcome email.
Confirm sending
The system will send the welcome email to the account’s registered email. You’ll see a confirmation message.
Verify account status
You can only close accounts that are active. Already closed accounts will show the De-active option.
Click Close Account
In the actions column, click Close Account.
Confirm action
A confirmation message will appear: “Are you sure you want to close this account? - This action will create an order to remove all the inventory after canceling returns and backorders.”
Process closure
If you confirm, the system will start a background process that:
Wait for confirmation
You’ll see a message indicating that the closure process has been requested. The process may take a few minutes. Check the status after a few minutes.
Locate closed account
Find an account that’s already closed. You’ll see the De-active option instead of Close Account.
Verify pending orders
The system will verify that all closure orders (Close-Account_*) have been shipped. If there are pending orders, you’ll see an error.
Confirm deactivation
Click De-active and confirm the action when prompted.
Process deactivation
The system will:
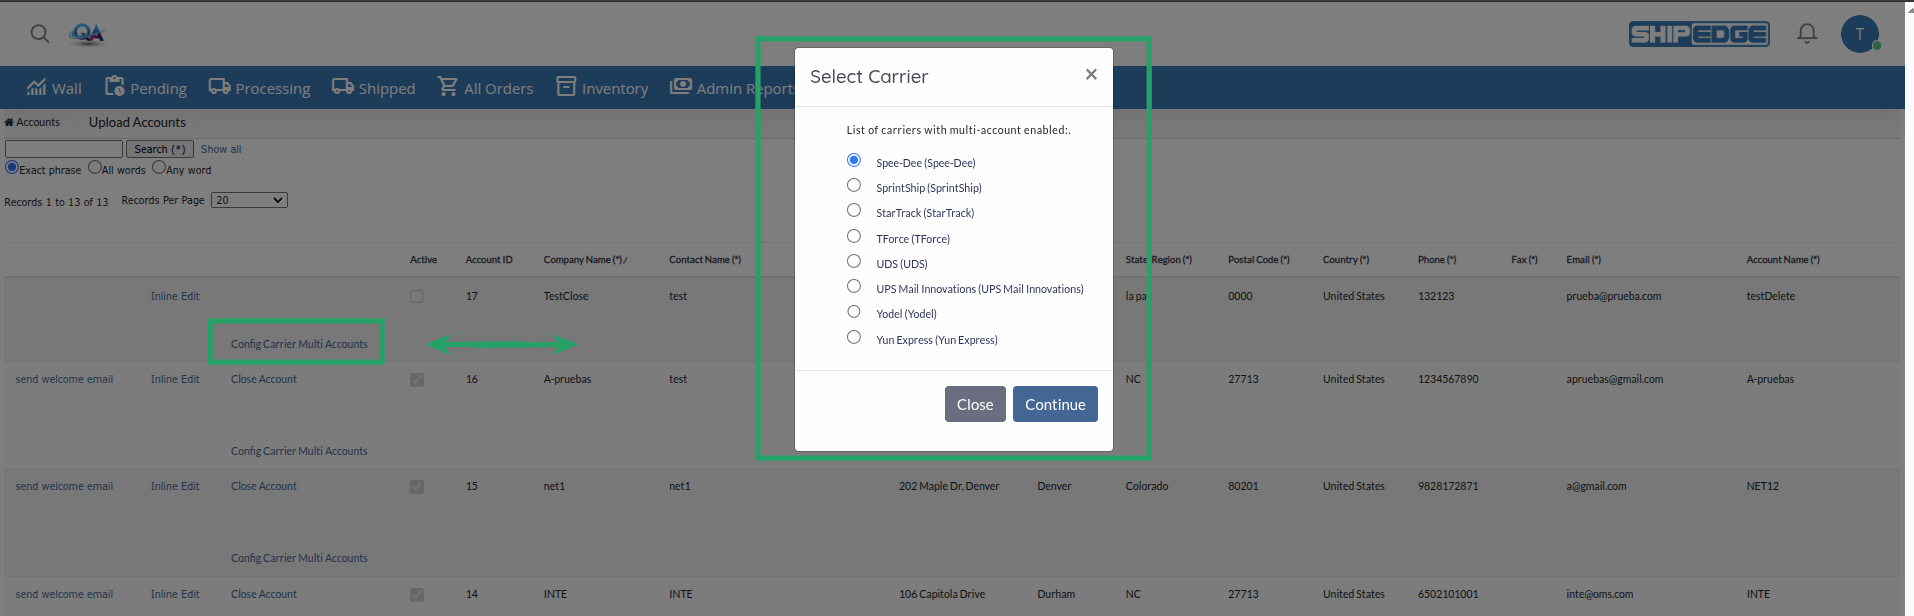
Click Config Carrier Multi Accounts
In the actions column, click Config Carrier Multi Accounts.
Configure carriers
A modal will open where you can configure available carriers for this specific account.
Save configuration
Complete the configuration and save changes according to options available in the modal.
Access Upload Accounts
At the top right of the page, click the Upload Accounts button.
Prepare your file
Prepare a CSV file with information for accounts you want to create or update.
Upload the file
Follow instructions in the modal to select and upload your CSV file.
Review results
The system will process the file and show you bulk upload results.
You can sort the table by clicking any column header:
Sortable columns include:
Before closing an account, verify that there are no important pending orders and that the client agrees with the closure.
Regularly update contact and address information for accounts to maintain accurate data.
Use search to find accounts quickly instead of navigating through multiple pages.
Make sure each account has a unique email. The system will validate this automatically when editing.
Only users with edit permissions can modify accounts. Verify your permissions before attempting to edit.
Before deleting SKUs or orders, consider backing up important information.
Problem: I don’t see the “Inline Edit” option or can’t save changes.
Solution:
Problem: The “Close Account” option doesn’t appear or the process fails.
Solution:
Problem: Search doesn’t return expected results.
Solution: