Skip to content

Restocking (Unexpected Returns)

The Restocking process allows you to handle unexpected or unauthorized merchandise returns. Unlike regular returns (RMA), restocking is used when you receive products you didn’t expect or that don’t have a prior return request.

Handle Unexpected Returns

Process returned products without prior authorization and correctly re-enter them into inventory.

Quality Control

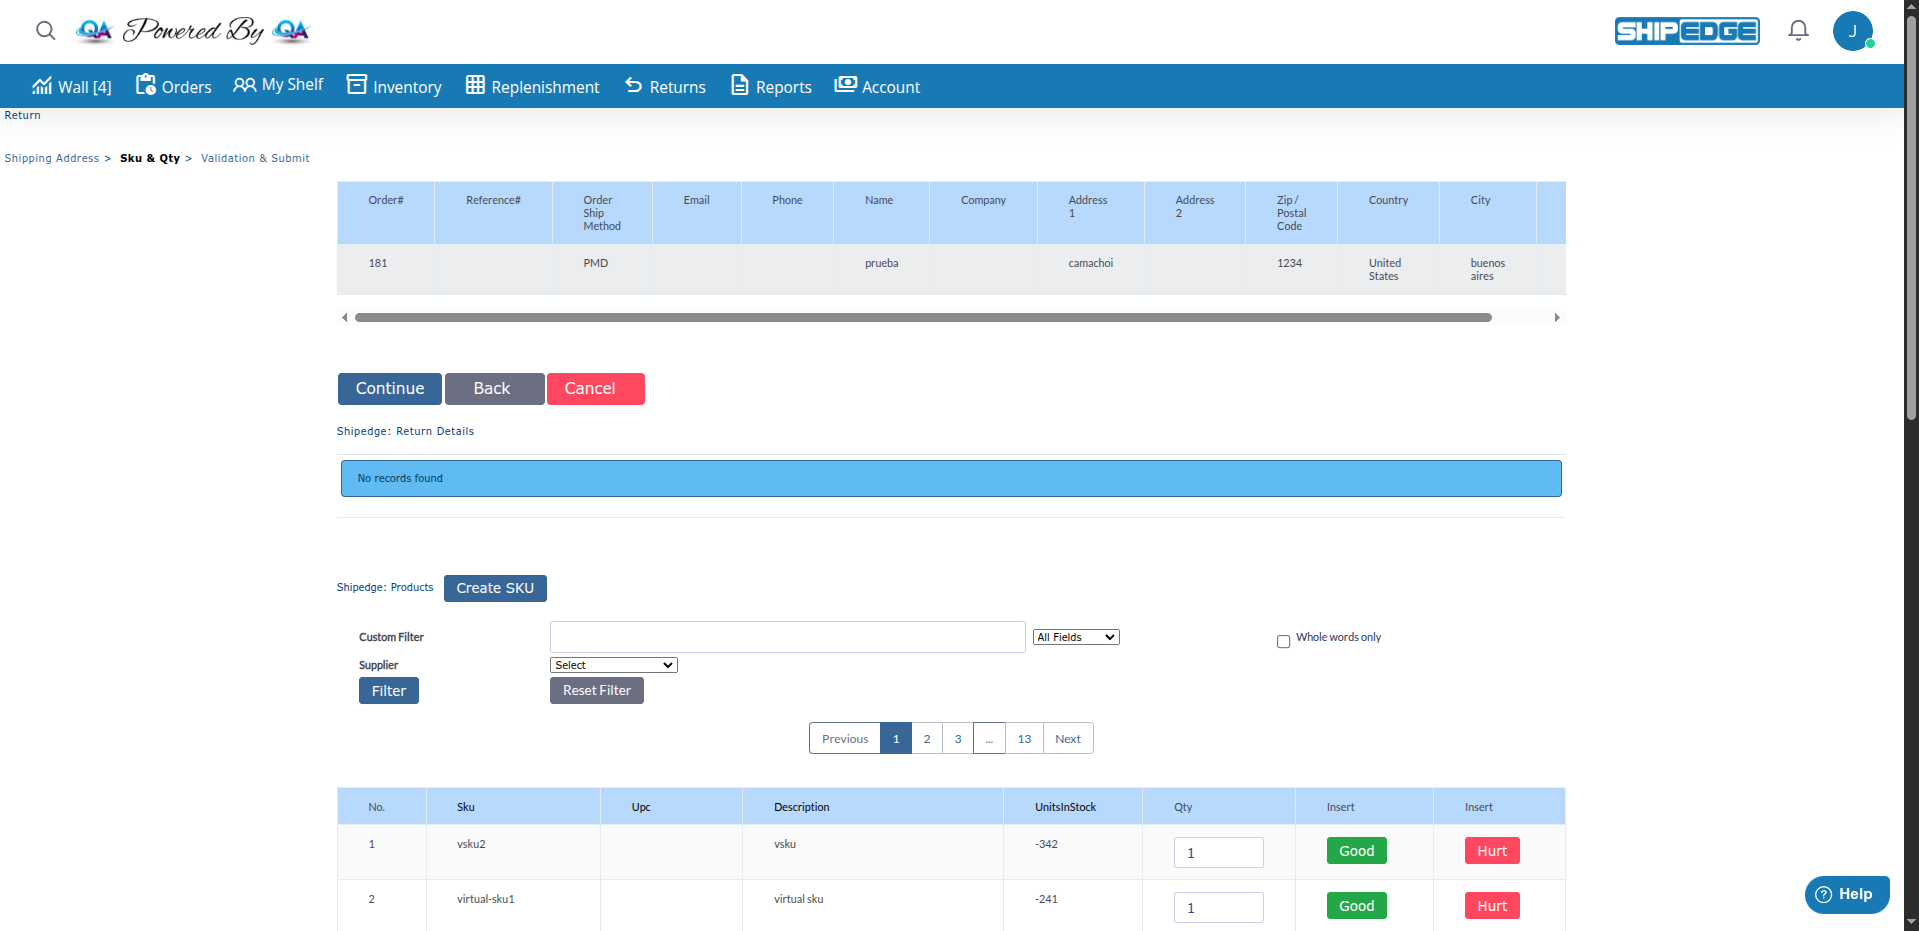
Classify products as “Good” or “Hurt” during the receiving process.

Complete Tracking

Records every inventory movement with unique RMA number and complete details.

Billing Integration

Automatically calculates return handling charges according to billing configuration.


Use the Restocking process when:

  • You receive returned products without a prior RMA request
  • A customer returns merchandise unexpectedly
  • You need to process inventory returns that weren’t authorized
  • Products return to the warehouse without following the normal returns flow

Difference from Regular RMA: Standard RMA returns are created when the customer requests a return. Restocking is used for returns that arrive without prior authorization.


  1. Navigate to Shipped Order

    Go to Orders > Shipped Orders and locate the order for which you received unexpected inventory.

    Open the order details view by clicking on the order number.

  2. Initiate Restocking Process

    In the shipped order view, look for the “Restocking” option (usually available in the actions menu).

    Click “Restocking” to create a return record.

  3. Review Order Information

    The system automatically creates a Return Order record with:

    • Original order number with _RS suffix or similar identifier
    • Customer details and address
    • List of originally shipped products
    • Initial status: In-Transit (24) or Pending (23)
  4. Wait for Physical Receipt

    The Restocking remains in In-Transit status until the warehouse confirms physical receipt of the products.

    Warehouse staff accesses through WMS > Returns to process.


Once the Restocking is created, warehouse staff must process it:

  1. Access the Restocking

    Warehouse staff opens WMS > Returns and locates the Restocking record by RMA number.

    Opens the return order details view.

  2. Verify Received Products

    For each SKU listed in the Restocking:

    • Physically verify the received quantity
    • Inspect product condition
    • Classify as Good or Hurt
  3. Assign Bin Location

    For each product:

    • Select the Bin Number (storage location)
    • Enter the Good quantity (products in good condition)
    • Enter the Hurt quantity (damaged products)
  4. Review Alternative SKUs (Optional)

    If you receive a different SKU than expected:

    • Use the “Other SKU” field to record the actual SKU received
    • Enter corresponding quantities
    • Assign the correct Bin location
  5. Submit (Finalize Process)

    Once all products are verified:

    • Click “Submit” to finalize
    • The system automatically updates inventory
    • Inventory history activity is generated
    • Billing charges are calculated (if applicable)

The Restocking process goes through different statuses:

Pending (23)

Initial status (OMS): Restocking created by OMS user, waiting for warehouse processing.

In-Transit (24)

Initial status (WMS): Restocking created by WMS user, products on the way to warehouse.

Processed - Green (25)

Successful: All received products match expected quantities and are in good condition.

Processed - Yellow (26)

Minor discrepancy: Some quantities or SKUs don’t match, but processed correctly.

Processed - Red (27)

Major discrepancy: Significant issues with quantities, SKUs, or product condition.


Route: /generate_restockingadd.php or from Orders > Shipped Orders > [Order] > Restocking

Who uses it: OMS users (managers, customer service representatives)

Purpose: Initiate the restocking process when an unexpected return is reported.

Route: /Retun_orderslist.php or WMS > Returns

Who uses it: Warehouse staff (warehouse staff, receivers)

Purpose: Physically process the restocking, verify products, assign bins, and finalize receipt.


FeatureRestockingRegular RMA
InitiationUnexpected returnPrior customer request
AuthorizationNo prior approval requiredRequires RMA authorization
Request Type”Restocking""Simple_Return”, “Exchange_now”, etc.
Order Number Suffix_RS or similar_RG, _XA, etc.
UseUnexpected productsAuthorized returns

Physical Verification

Always physically verify products before entering them into the system. Don’t rely solely on documents.

Correct Classification

Separate “Good” and “Hurt” products immediately upon receipt. This prevents errors in available inventory.

Bin Assignment

Use specific bins for returned products. This facilitates inspection and re-processing if necessary.

Documentation

Use the comments field to record important details about product condition or return reasons.

Alternative SKUs

If you receive a different SKU than expected, use the “Other SKU” field instead of forcing the original SKU.

Count Corrections

If you mark the correction option during the process, the system automatically creates a “Re-Count” record for audit purposes.


”The Re-stocking has already been realized”

Section titled “”The Re-stocking has already been realized””

Problem: You’re trying to process a restocking that was already finalized.

Solution: Check the RMA status. If it’s already in status 25, 26, or 27, the process is complete. If you need to make adjustments, use Corrections (Recounts) instead of reopening the restocking.


”The quantities of SKUs and Qtys must be the same”

Section titled “”The quantities of SKUs and Qtys must be the same””

Problem: There are inconsistencies in the entered quantities.

Solution:

  • Verify that the sum of Good + Hurt matches the total expected quantity
  • If you received a different quantity, use the comments field to explain
  • Complete all quantity fields before submitting

Problem: You tried to process without assigning a storage location.

Solution:

  • Each processed SKU must have a Bin Number assigned
  • If you don’t have a specific bin, use a temporary receiving bin
  • You can reassign the bin later using Editing Bins or Bin Mirror

Problem: The Restocking option doesn’t appear available.

Solution:

  • Verify that the order is in Shipped status (9)
  • Confirm you have OMS permissions to create restocking
  • Verify that a restocking doesn’t already exist for that order

When a restocking is completed:

  • The system records Return Handling charges according to billing configuration
  • Processing fees are applied (if configured)
  • Charges appear on the customer invoice

When restocking is finalized:

  • QtyGood is updated in the products table for SKUs in good condition
  • QtyHurt is updated for damaged SKUs
  • UnitsInStock is incremented with the total products received
  • A record is created in the history table with type “Re-stocking”

If the received products were on backorder:

  • The system automatically releases waiting orders
  • Customers are notified that the product is available again

A webhook is triggered when restocking is completed:

  • Event: unexpected_return/order_received
  • Includes: RMA ID, OrderID, final status, product details

Location: View in the original order view or in the Returns listing

Information included:

  • Creation and processing date
  • User who created and processed the restocking
  • Expected vs. received quantities
  • Final status (color)
  • Comments and observations

Each restocking action is recorded in the Activity Log:

  • Restocking creation
  • Bin assignment
  • Quantity updates
  • Process finalization

Next Step: Return Label Status - Track the status of return labels

See Also: