Standard Reports Library
Access a wide range of pre-built reports covering orders, inventory, shipping, transactions, and more. No need to build custom queries.
The Reports Overview page is your central hub for generating and managing business reports in ShipEdge OMS. Access standard reports for common analytics needs, schedule automated reports, and view your generated report history. Reports help you track orders, inventory, shipping costs, and other key business metrics.

Access a wide range of pre-built reports covering orders, inventory, shipping, transactions, and more. No need to build custom queries.
Set up reports to run automatically on a schedule. Choose daily, weekly, or custom schedules and receive reports via email.
Generate reports for any date range using preset options (Today, Last 7 Days, Last Month) or custom date ranges.
Apply filters by account, order status, SKU, and other criteria to get exactly the data you need for analysis.
Navigate to Reports
Click Reports in the main navigation menu. The Reports Overview page loads showing available standard and advanced reports.
View Report Categories
The page displays two tabs:
Browse Available Reports
Each report card shows:
Select a Report
Click View on any report card, or click the report name to open the configuration modal.
Configure Report Parameters
In the modal, set up your report:
Set Date Range
Use the date range picker to select:
Apply Filters (if available)
Depending on the report, you may see filter options such as:
Generate Report
Click Generate to create the report immediately. The report is added to the queue and will be available for download when processing completes.
Open Schedule Configuration
Click Schedule on any report card to open the configuration modal in schedule mode.
Configure Report Parameters
Set up the report parameters as you would for immediate generation:
Set Schedule Frequency
Use the cron picker to configure when the report runs:
Choose Date Range for Scheduled Reports
Select how far back the scheduled report should look:
Save Schedule
Click Schedule to save the automated report. A badge appears on the report card showing the schedule exists.

Access Generated Reports
Click Generated in the page header to view your report history.
View Report List
The table shows all generated reports with:
Download Reports
Click the Download link for completed reports to get your CSV file.
Monitor Report Status
Check the Status column to see if your report is:
The Reports Overview includes many standard and advanced reports. Some reports require specific modules to be activated.
Order Reports:
Inventory Reports:
Shipping & Cost Reports:
Financial Reports:
Warehouse Operations Reports:
Product Reports:
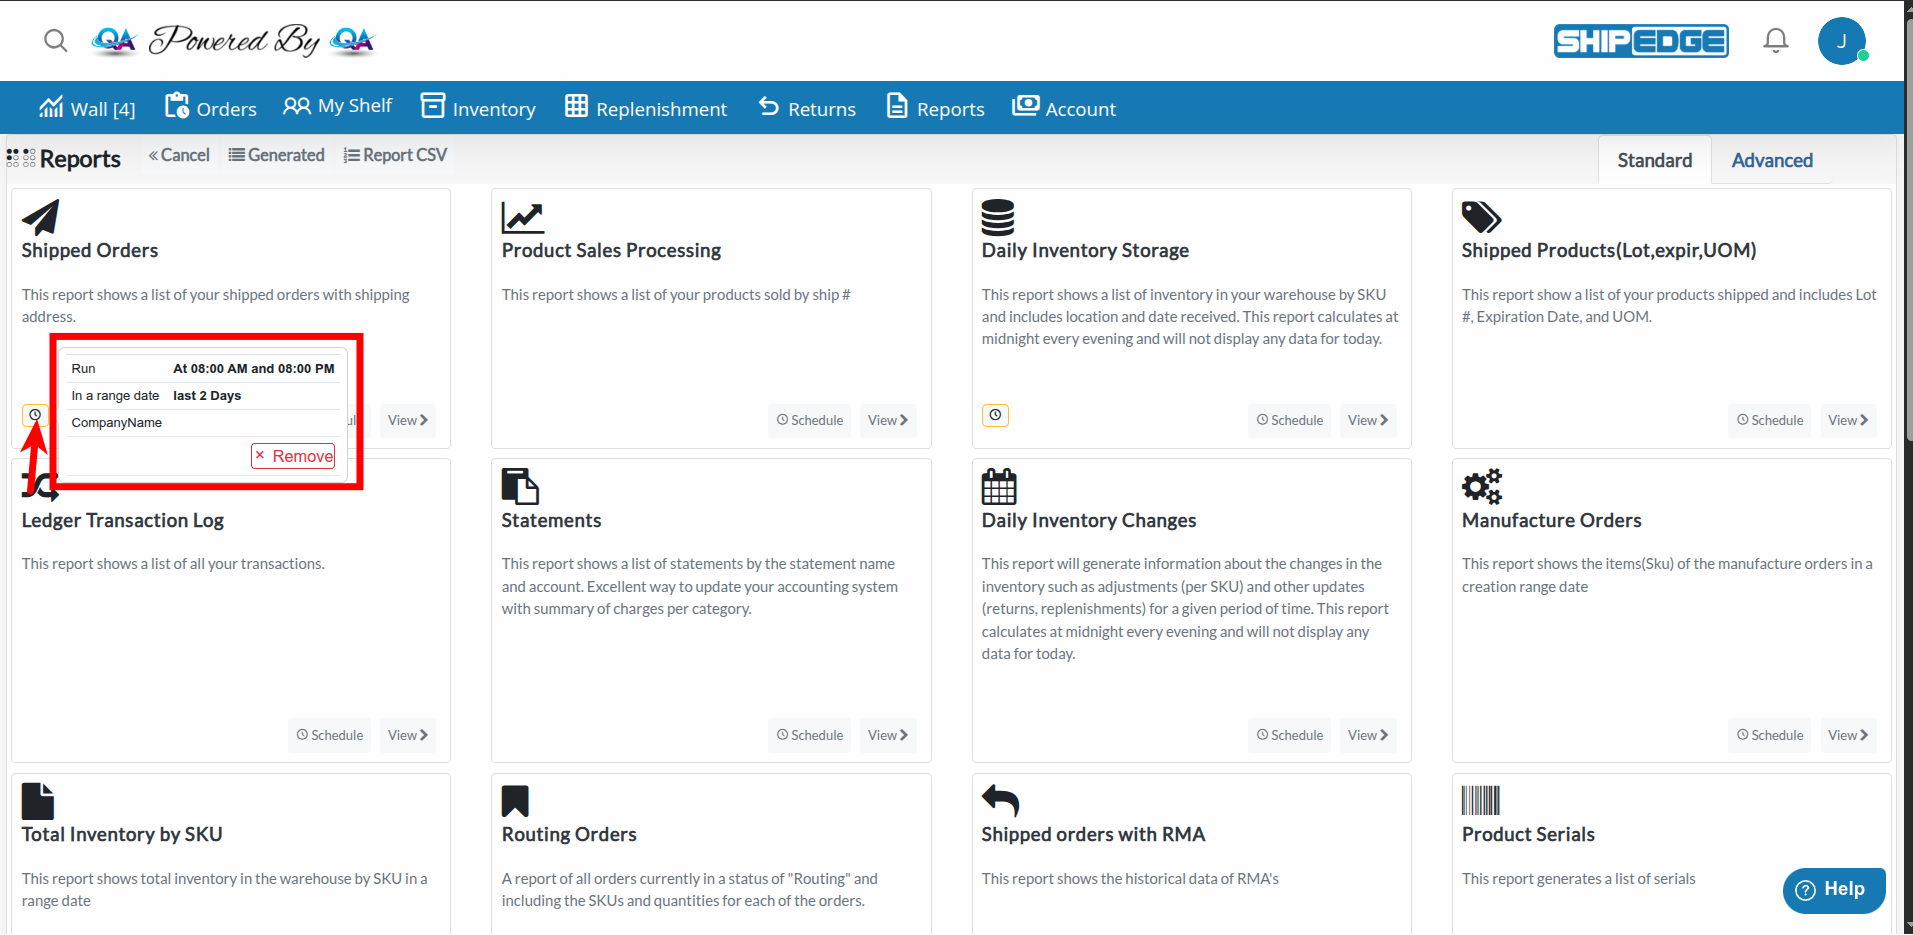
View Scheduled Reports
Scheduled reports appear as badges on report cards. Hover over a badge to see schedule details.
View Schedule Details
Hover over a scheduled report badge to see:
Remove a Schedule
Hover over the scheduled report badge and click Remove to delete the automated schedule.
Note on Multiple Schedules
Each report can only have one scheduled run. If you need multiple schedules, you’ll need to remove the existing one first.
When generating reports, customize the report name to include date ranges or specific filters. This makes it easier to identify reports later.
Set up scheduled reports for reports you need regularly (daily, weekly, monthly). This saves time and ensures consistent data tracking.
Some reports have date range limits (e.g., Daily Inventory Changes is limited to 90 days). Check the modal for any warnings before generating.
Apply filters to narrow down large datasets. This makes reports more focused and easier to analyze, and can improve processing speed.
Report Status Stuck on “Pending”
Advanced Reports Not Available
Schedule Not Running
Report Generation Fails
Can’t See Expected Reports
Next Steps: