Faster Order Entry
Select saved addresses instead of typing customer information each time. This speeds up order creation significantly.
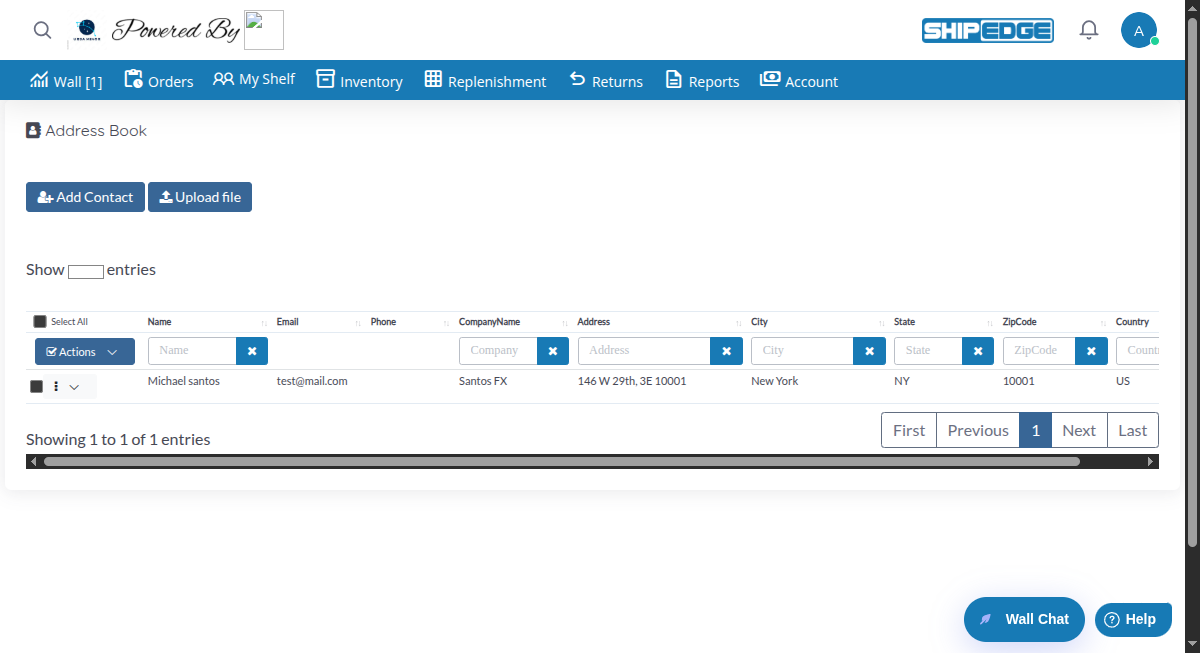
The Address Book stores customer contact information and shipping addresses. Use it to quickly fill customer details when creating orders, reducing typing errors and speeding up order entry. All addresses are saved per account and can be reused across multiple orders.
Select saved addresses instead of typing customer information each time. This speeds up order creation significantly.
Saved addresses ensure consistent, accurate customer information across all orders. No more typos or missing fields.
Upload multiple addresses via CSV, export contacts, and manage large customer lists efficiently.
Update customer information in one place. Changes apply to future orders automatically.
Open Address Book
Navigate to Address Book from the main menu or Orders section.
Click Add Contact
Click the Add Contact button in the top toolbar to open the address form.
Enter Required Information
Fill in the required fields:
Add Optional Details
Complete additional fields as needed:
Save the Contact
Click Save to add the contact to your address book. The contact appears in the table immediately.
The Address Book displays all contacts in a searchable table with these columns:
Each column has a search filter at the top. Type in the filter boxes to find contacts quickly:
Click the X button in each filter to clear it.
Find the Contact
Use the search filters or scroll through the table to locate the contact you want to edit.
Open Edit Menu
Click the three-dot menu (⋮) in the contact’s row, then click Edit.
Update Information
The address form opens with all current information filled in. Make your changes to any fields.
Save Changes
Click Save to update the contact. The table refreshes automatically with the updated information.
Find the Contact
Locate the contact you want to delete in the table.
Open Delete Menu
Click the three-dot menu (⋮) in the contact’s row, then click Delete.
Confirm Deletion
A confirmation dialog appears. Click Yes to delete the contact permanently.
Select Contacts
Check the boxes next to each contact you want to delete. Or click Select All to select all contacts on the current page.
Open Actions Menu
Click the Actions dropdown button in the filters row.
Choose Delete
Click Delete contacts from the dropdown menu.
Confirm Deletion
A confirmation dialog appears. Click Yes to delete all selected contacts permanently.
Download Template
Click the Upload file button, then click Download template CSV to get the correct format.
Prepare Your CSV File
Fill in the template with your contact information. Required columns:
Optional columns:
Upload the File
Click Upload file, select your CSV file, then click Upload Address Book.
Wait for Processing
The system processes your file and adds all contacts. A success message shows when complete.
Select Contacts
Check the boxes next to each contact you want to export. Or click Select All to export all contacts on the current page.
Open Actions Menu
Click the Actions dropdown button in the filters row.
Choose Export
Click Export to CSV from the dropdown menu.
Download File
The CSV file downloads automatically with all selected contacts. The file includes: FirstName, LastName, Email, Phone1, Phone2, Company, Address1, Address2, City, State, PostalCode, Country.
When creating a new order, you can access the Address Book:
Fill in as much information as possible when adding contacts. Complete addresses help with shipping accuracy and customer communication.
Keep address formats consistent (e.g., always use abbreviations or always spell out). This helps with address validation and shipping.
Review and update customer addresses periodically. People move, and outdated addresses cause shipping problems.
Use the search filters to quickly find contacts instead of scrolling through long lists. Filters work on multiple columns at once.
If you have many contacts to add, use the CSV upload feature instead of adding them one by one. It’s much faster.
Export your address book to CSV before making bulk deletions or major updates. This gives you a backup copy.
Problem: You see an alert saying “The name is required” when trying to save.
Solution: Make sure the First Name field is filled in. This is a required field and cannot be empty.
Problem: You see an alert saying “The address1 is required” when trying to save.
Solution: Fill in the Address 1 field. This is a required field and cannot be empty.
Problem: You see an alert saying “The Zip code is required” when trying to save.
Solution: Enter a value in the Zip/Postal Code field. This is a required field and cannot be empty.
Problem: You see an alert when trying to delete or export contacts.
Solution: Select at least one contact by checking the box next to the contact’s name before using bulk actions.
Problem: The CSV upload shows an error message.
Solution:
Problem: You select a contact from Address Book, but the information doesn’t fill in the order form.
Solution:
Next Steps: