Multi-Location Fulfillment
Fulfill orders from multiple warehouses and external distribution centers to reduce shipping costs and delivery times.
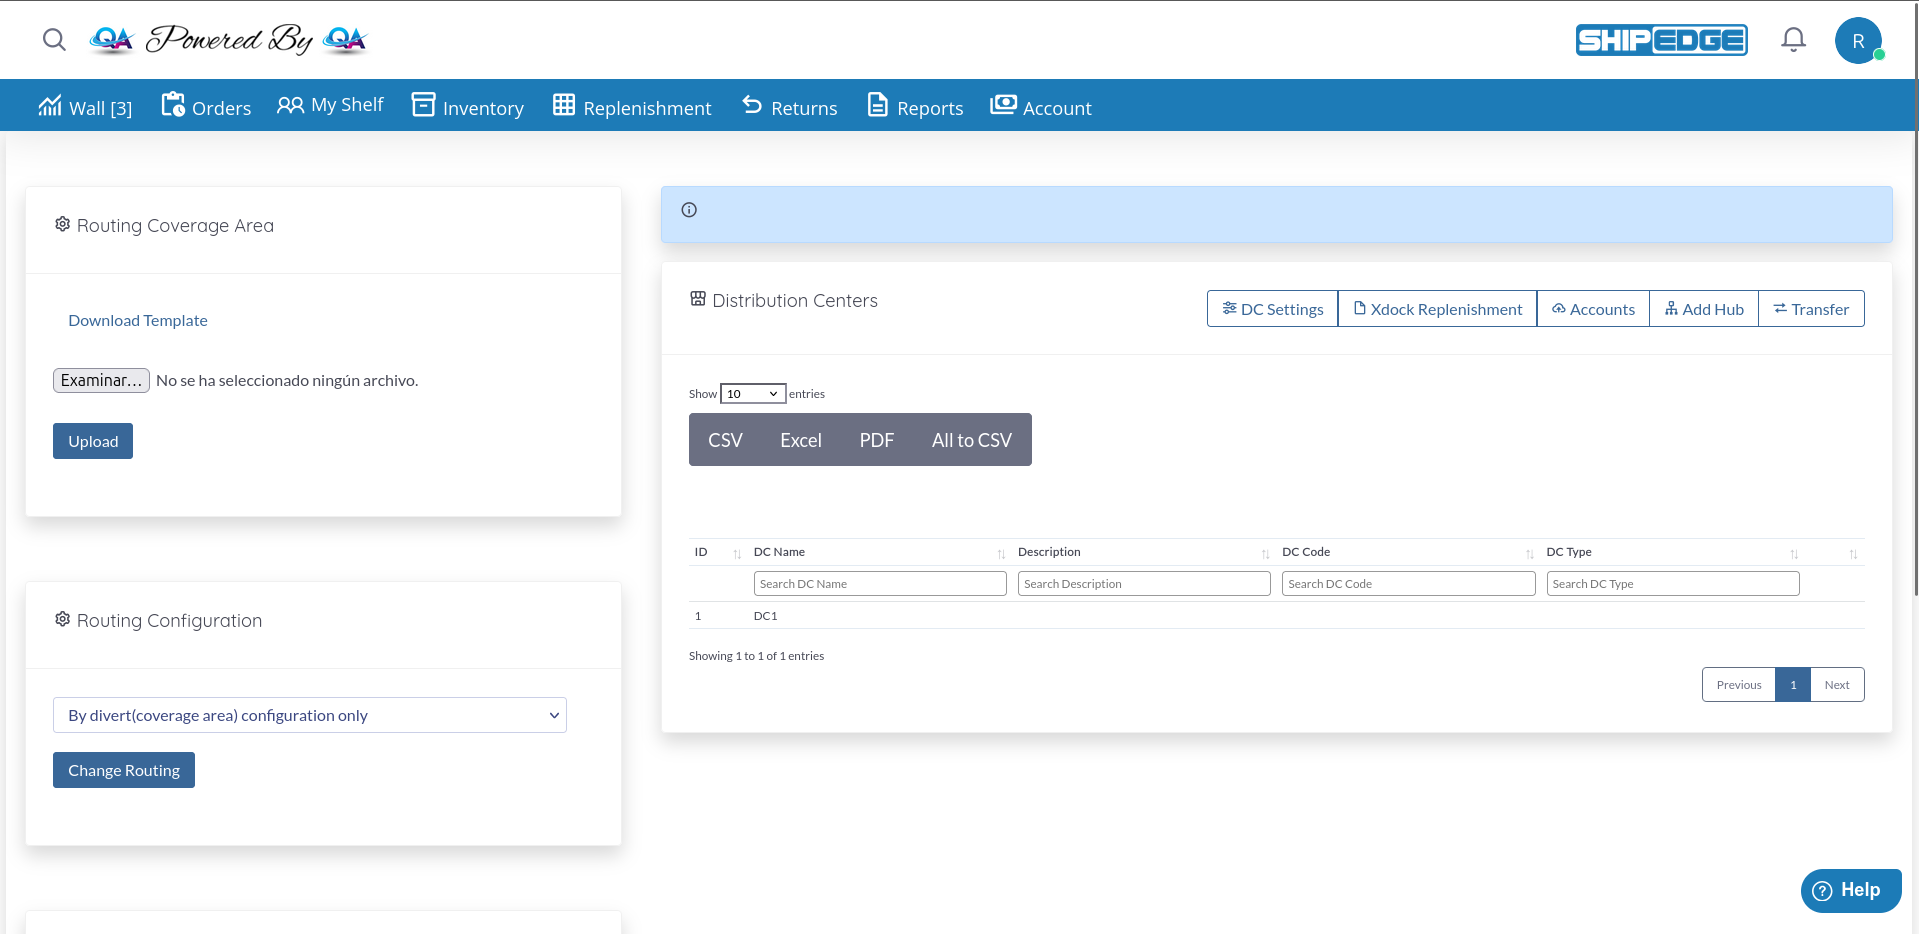
Distribution Centers let you manage inventory and orders across multiple warehouse locations, including your main warehouse and external fulfillment centers (network locations). You can configure routing rules to automatically send orders to the best location based on inventory, shipping costs, and delivery zones.
Fulfill orders from multiple warehouses and external distribution centers to reduce shipping costs and delivery times.
Let the system automatically route orders to the best distribution center based on delivery zone, inventory availability, and cost.
Connect to external warehouses and sync inventory in real-time. View combined inventory across your entire network.
Configure routing rules, crossdock templates, supplier assignments, and coverage areas for each distribution center.
The Distribution Centers page has four main sections:
Configure how orders are diverted to specific distribution centers based on delivery address:
CSV Template Fields:
dc_code: Distribution center codeOrder Fulfillment Process: How orders are fulfilled (Dropship, Supplier, etc.)Divert by: What criteria to use for diverting orders (Address2, ZIP, etc.)Divert orders with: The specific value to matchAllow backorders: Allow or prevent backorders (yes/no, true/false)Quantity to use: Which quantity to consider (available, inwh, reserve)Next Favorite: List of backup warehouses to trySelect the main routing strategy for all orders:
Available Routing Templates:
Configure how crossdock orders (orders fulfilled directly from suppliers) are handled:
Available Crossdock Templates:
Additional Options:
View and manage all your distribution centers:
Table Columns:
Search and Filter:
Each distribution center has a dropdown menu (three dots icon) with the following options. Note that some options only appear for active DCs:
If you use different SKU codes at different distribution centers, you can maintain a translation table:
Download Current Translations
Click the dropdown menu and select “Download Sku’s” to get a CSV file with current SKU mappings.
Edit the CSV File
The CSV contains three columns:
Upload the Updated File
Click “Upload Sku’s” to upload your edited CSV file with SKU translations.
Opens the integration settings page for the distribution center where you can configure:
If the distribution center represents a supplier/dropshipper:
Add tags to control routing and replenishment behavior:
Common Tags:
How to Use Tags:
Click in the Tag Field
The tag input field appears in the dropdown menu with placeholder text “Press Enter to save it”.
Type Your Tag and Press Enter
Enter tags like priority=1 or autoreple and press Enter to save.
Remove Tags
Click the X on any tag to remove it. Changes are saved automatically.
Enable this checkbox to sync the DC’s inventory quantities with your main warehouse:
Duplicates your main warehouse (DC1) inventory with a special suffix to track quantities separately:
_XDCX suffixImports and updates all inventory from an external distribution center:
For network distribution centers (connected ShipEdge warehouses):
View integration logs for the distribution center to troubleshoot sync issues or review order routing history.
If you have the “Logistic Centers” module enabled (logistic_centers activation), you can connect to other ShipEdge warehouses:
Click “Add Hub” Button
Located in the toolbar at the top of the page. Opens a modal dialog showing available network locations.
Select the Warehouse
Choose which ShipEdge warehouse to connect to from the available network locations displayed as cards.
Configure Parameters
For each warehouse location, set up the connection parameters:
Click “Add” Button
Click the “Add” button on the warehouse card to initiate the connection process.
Wait for Setup
The system will:
dc_type = 'network'If enabled, you can transfer inventory between your main warehouse and network distribution centers:
Click “Transfer” Button
Located in the toolbar at the top of the page.
Select Origin and Destination
Choose which location to transfer from and which location to transfer to.
Enter Transfer Details
Specify the SKUs and quantities to transfer.
Confirm Transfer
The system creates a transfer request between the warehouses.
You can automate replenishment creation between distribution centers:
Creates replenishments based on the configured crossdock template:
Add “autoreple” Tag
Add the autoreple tag to distribution centers that should receive automatic replenishments.
Click “Xdock Replenishment” Button
Located in the toolbar at the top of the page.
Confirm Action
The system creates replenishment requests for all DCs with the autoreple tag, following the crossdock template rules.
Automatically creates POs and replenishments for oversold items:
Add Tags to Distribution Centers
Add lineitems=## tag (e.g., lineitems=50) to set how many SKUs per PO.
Optionally add shipcode=XXXX to specify shipping method.
Process Runs Automatically
The system:
Test your routing configuration with a few test orders before rolling out to production. Use the HOLD routing template for testing.
Assign priority numbers (1, 2, etc) to control which DCs are tried first when routing orders.
Watch for the spinning sync icon when syncing large catalogs. Don’t start multiple syncs simultaneously.
Use the CSV upload to configure detailed coverage areas for each distribution center. This gives you fine-grained control over routing.
Only enable “Active Qty” on DCs where you want to combine inventory. This affects what quantities are shown to your sales channels.
If you use different SKU codes at different DCs, keep your SKU translation table updated to prevent routing errors.
Click “DC Settings” in the toolbar to access advanced distribution center preferences:
If the EXOS setting is enabled, you can manage accounts for external warehouse connections:
Problem: Orders are going to the wrong distribution center.
Solution:
Check Routing Configuration
Verify your selected routing template matches your needs.
Review Coverage Area Settings
Download the coverage area template and check the divert rules for each DC.
Verify DC Inventory
Check that the distribution center has available inventory for the product.
Check DC Tags
Priority tags affect routing order. Lower priority numbers are tried first.
Review Logs
Use the “Logs” option in the DC menu to see routing decisions for specific orders.
Problem: SKUs are not syncing to network distribution center.
Solution:
Check if Sync is in Progress
Look for a spinning icon next to the DC name in the table. If present, wait for the current sync to complete before starting a new one.
Verify Button is Enabled
The “Sync Hub Skus” button is disabled while a sync is in progress. Wait until the spinning icon disappears and the button becomes enabled.
Check Sync Status
Click “Logs” in the DC dropdown menu to view sync errors and identify problematic SKUs.
Verify Credentials
Go to “Configuration” in the DC dropdown menu and verify the API credentials are correct.
Check SKU Data
Ensure your SKUs have all required fields (description, weight, etc.) before syncing.
Check Process Queue
The system uses a process queue for syncing. If syncs fail repeatedly, check the process_queue table for errors.
Problem: Inventory quantities from external DC are not updating.
Solution:
Enable Active Qty
Check the “Active Qty” checkbox in the DC’s dropdown menu.
Run Manual Sync
Click “Sync inventory” to force an immediate inventory update.
Verify Integration Settings
Go to “Configuration” and check that inventory sync is enabled.
Check API Connection
Use “Logs” to verify the API connection is working.
Problem: Automatic replenishments are not being created.
Solution:
Verify “autoreple” Tag
Ensure the distribution center has the autoreple tag added.
Check Crossdock Configuration
Verify you have a crossdock template selected.
Enable Automation Checkbox
Check the “Automate daily creation of Replenishment” option.
Verify Schedule
Contact support to confirm your automated replenishment schedule is configured.
Next Steps:
For more advanced distribution center routing strategies, contact ShipEdge support for custom routing template configuration.