Complete Product Setup
Create products with all details in one place: basic info, dimensions, pricing, serial numbers, and more.
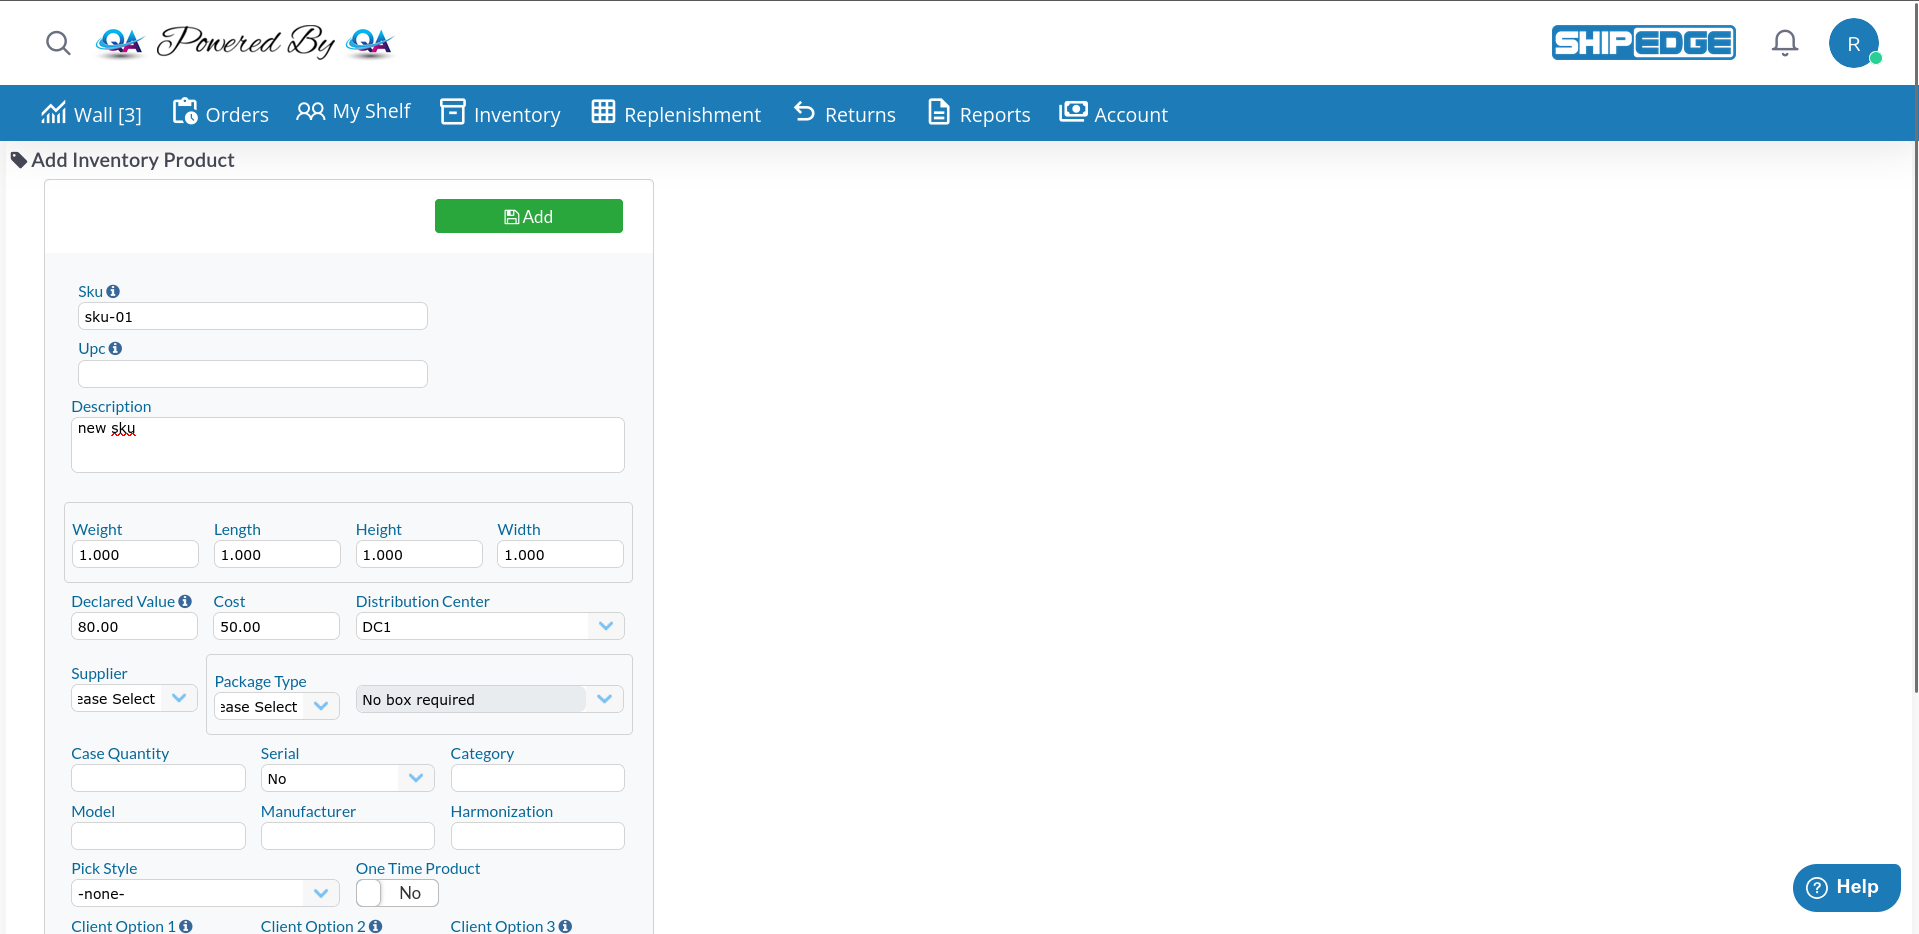
The Creating Products interface is the modern way to add new inventory items to your ShipEdge catalog. It provides a comprehensive form with all product fields, image management, and advanced features like Unit of Measure (UOM) packages, product sets (synsets), and aliases.
Create products with all details in one place: basic info, dimensions, pricing, serial numbers, and more.
Upload and manage multiple product images directly from the creation interface.
Set up UOM packages, product families (synsets), aliases for different channels, and alternative products.
Real-time validation ensures SKUs are unique and all data meets requirements before saving.
Navigate to Catalog Overview
Go to Inventory > Catalog.
Click “Add SKU” Button
Located in the toolbar at the top of the page.
Product Form Opens
The empty product creation form appears.
Every product must have these three fields:
SKU (Unique Product Code)
Enter a unique identifier for the product.
_.#/~&|()+-Description
Enter a clear product description.
Distribution Center
Select the primary distribution center for this product.
Click “Add” Button
Click the green “Add” button at the top-right to create the product.
The page refreshes and switches to edit mode, showing additional tabs for images, history, and advanced features.
UPC/Barcode:
-_.,#SKU Image:
Weight:
Length, Height, Width:
Declared Value (Retail Price):
Cost:
Package Type:
Case Quantity:
Serial Numbers:
Category:
Model Number:
_.#/~&|()+-Manufacturer:
Pick Style:
One Time Product:
[OTP] tag in product listingsHarmonization (HS/HTS Code):
Country of Origin:
Tags:
-_.,# allowedClient Option 1, 2, 3:
Once you create a product, the interface switches to edit mode and shows additional tabs on the right side:
Configure inventory sync preferences:
Reserve Percentage:
Upload and manage product images:
Click the “Images” Tab
Opens the image carousel section.
Upload Images
Drag and drop images or click to browse.
Set Main Image
Mark one image as the main product image.
Rearrange Images
Drag images to reorder them.
Delete Images
Click the delete icon to remove images.
View complete product history:
Inventory Summary:
Transaction History Table:
Create multi-unit packages (packs, cases, pallets):
Click “Add” Button
Below the UOM table.
Fill Out UOM Details
Double-click any row to edit or create new UOM:
{SKU}^{Name} (e.g., MYSKU^pk12)Save UOM
Click the checkmark icon to save.
Create Nested UOMs
Drag and drop one UOM onto another to create hierarchy (e.g., pallet of cases).
Add this product to product families/bundles:
View Synsets Tab
Shows all product families this SKU belongs to.
Add to Synset
Search for existing synsets and add this product.
Set Quantity
Define how many of this SKU are in each synset.
Create alternative SKU names for different channels or distribution centers:
Click “Add” Button
Below the translators table.
Fill Out Alias Details
Save Alias
Click the checkmark icon to save.
Use Cases:
Set up alternative products for automatic substitution:
To edit a product after creation:
Navigate to Product
From Catalog Overview, click on a product that you can edit.
Form Loads in Edit Mode
Make Your Changes
Update any fields you need to change.
Click “Save” Button
Green button at top-right saves all changes.
Success Notification
A toast notification appears confirming the save.
To stop using a product without deleting it:
Open Product in Edit Mode
Navigate to the product you want to discontinue.
Click “Discontinue” Button
Located at the top-left of the form.
Confirm Discontinuation
Product is marked as discontinued.
SKU Becomes Editable
Once discontinued, you can rename the SKU or delete the product entirely.
Only discontinued products can be deleted:
Discontinue the Product First
Follow the discontinuation process above.
Click “Delete” Button
Replaces the “Discontinue” button after discontinuation.
Confirm Deletion
Product is permanently removed from the database.
Allowed Characters: a-z A-Z 0-9 _ . # / ~ & | ( ) + -
Not Allowed:
@, $, %, *, ?Best Practices:
Requirements:
Requirements:
Enter only the required fields (SKU, Description, DC) first. Add dimensions, images, and advanced features after the product is created.
Develop a SKU naming convention and stick to it. Include product type, size, or color codes for easy identification.
Always add weight and dimensions for accurate shipping cost calculations and cartonization.
Add clear product images to help warehouse staff identify items during picking and packing.
Use FIFO for perishable goods, FEFO for items with expiration dates, and Standard for everything else.
If you receive or sell products by the case, create UOM packages to track case-level inventory.
Problem: Error message “SKU already exists” when trying to create a product.
Solution:
Search for the Existing SKU
Go to Catalog Overview and search for the SKU.
Check if It’s Your Product
Check for Typos
Ensure there are no extra spaces or different capitalization.
Check Synsets and Aliases
The SKU might exist as an alias or within a synset.
Problem: Save button doesn’t work or shows validation errors.
Solution:
Check Required Fields
Ensure SKU, Description, and Distribution Center are filled out.
Verify Field Formats
Clear Invalid Characters
Remove any special characters that aren’t allowed.
Scroll to Error Messages
Red error messages appear next to invalid fields.
Problem: Product images won’t upload or save.
Solution:
Check Image Format
Supported formats: JPG, PNG, GIF. Try converting to JPG if using another format.
Reduce Image Size
Large images (>5MB) may fail. Resize images to under 2MB.
Save Product First
You cannot upload images until the product is saved and has a Product ID.
Check Browser Console
Open developer tools (F12) and check for error messages.
Problem: Unit of Measure packages won’t save or drag-and-drop doesn’t work.
Solution:
Fill Out Required Fields First
Unit Factor and Name are required before saving.
Check Unit Factor Multiplier
When nesting UOMs, ensure the parent’s Unit Factor is a multiple of the child’s (e.g., case of 12, pallet of 48).
Save Before Dragging
Save new UOMs with the checkmark icon before trying to drag and nest them.
Reload if Stuck
If the treegrid is unresponsive, refresh the page and try again.
Recommended Next Steps:
Advanced Features:
For bulk product imports, use the “Import Products” feature from the Catalog Overview toolbar. This allows you to create hundreds or thousands of products at once via CSV upload.