Preferences is your central configuration hub for managing account settings, user profiles, email notifications, communication templates, and integration preferences in ShipEdge OMS. Configure how your account operates, who receives notifications, and how your system communicates with customers and partners.

Manage all account settings from one place. Configure user profiles, email notifications, templates, and integrations without navigating to multiple pages.
Control how and when emails are sent. Set up email templates, configure notification preferences, and manage customer communication settings.
Add and manage users for your account. Set permissions, configure access levels, and control what each user can see and do.
Configure API integrations, webhooks, and channel automation. Connect your account with external systems and automate workflows.
-
Navigate to Account Overview
Click Account in the main navigation menu, then click Preferences from the Account Overview page.
-
View Preferences Tabs
The Preferences page loads with multiple tabs organized by category:
- Main User Profile
- User Accounts
- Communications Settings
- Communication Templates
- Inventory Forecasting and Alerts Setting
- API Integration
- Webhooks
- Channel Automation
- Billing (if enabled)
-
Select a Tab
Click any tab to view and configure settings for that category.
Purpose: View and edit your main user account information.
Available Information:
- User Name
- Password (masked)
- Company Name
- Contact Title
- First Name
- Last Name
- Address
- City
- State/Region
- Country
- ZIP/Postal Code
- Main Phone
- Email
- ID#
- VAT/Tax#
How to Edit:
- Click Edit button in the Main User Profile tab
- Update the fields you want to change
- Click Save to apply changes
Note: Some fields like Company Name may be managed at the account level and cannot be changed from this section.
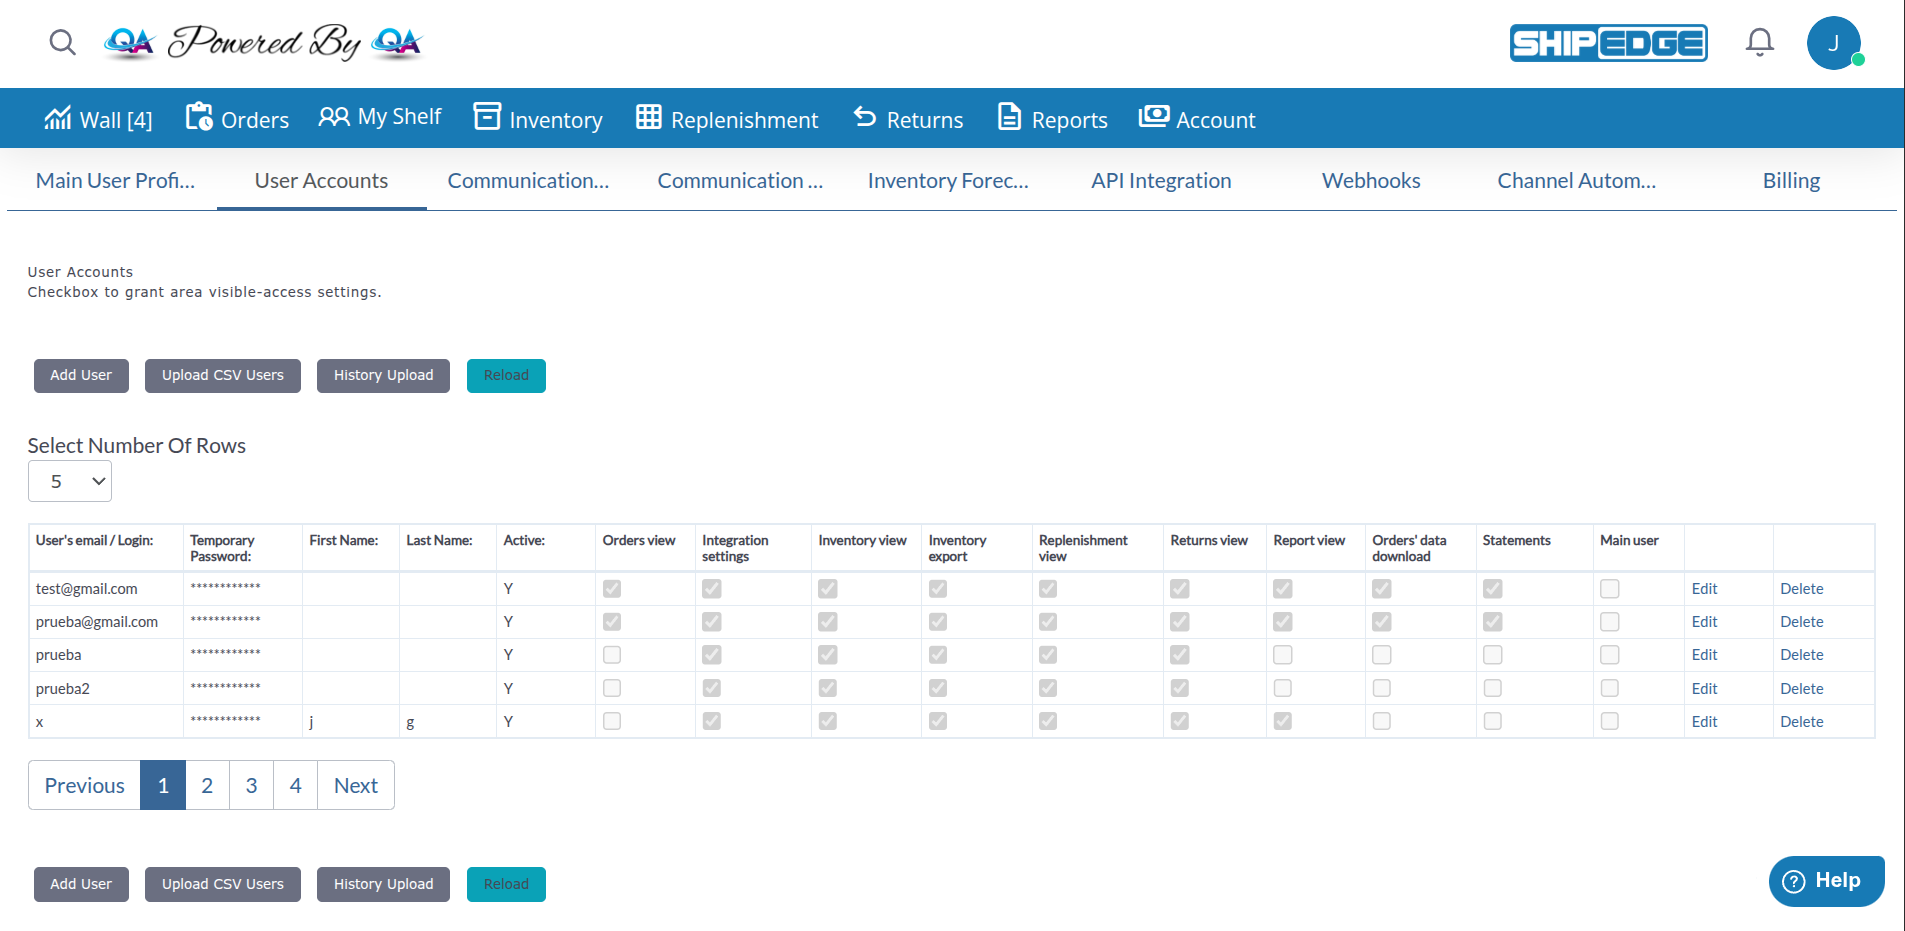
Purpose: Add and manage additional users for your account.
Features:
- View list of all users
- Add new users
- Edit existing users
- Set user permissions
- Configure access levels
- Manage user passwords
User Permissions Include:
- Inventory View
- Inventory Export
- Order View
- Order Edit
- Other role-specific permissions
More Information: See user management documentation for detailed permission configuration.
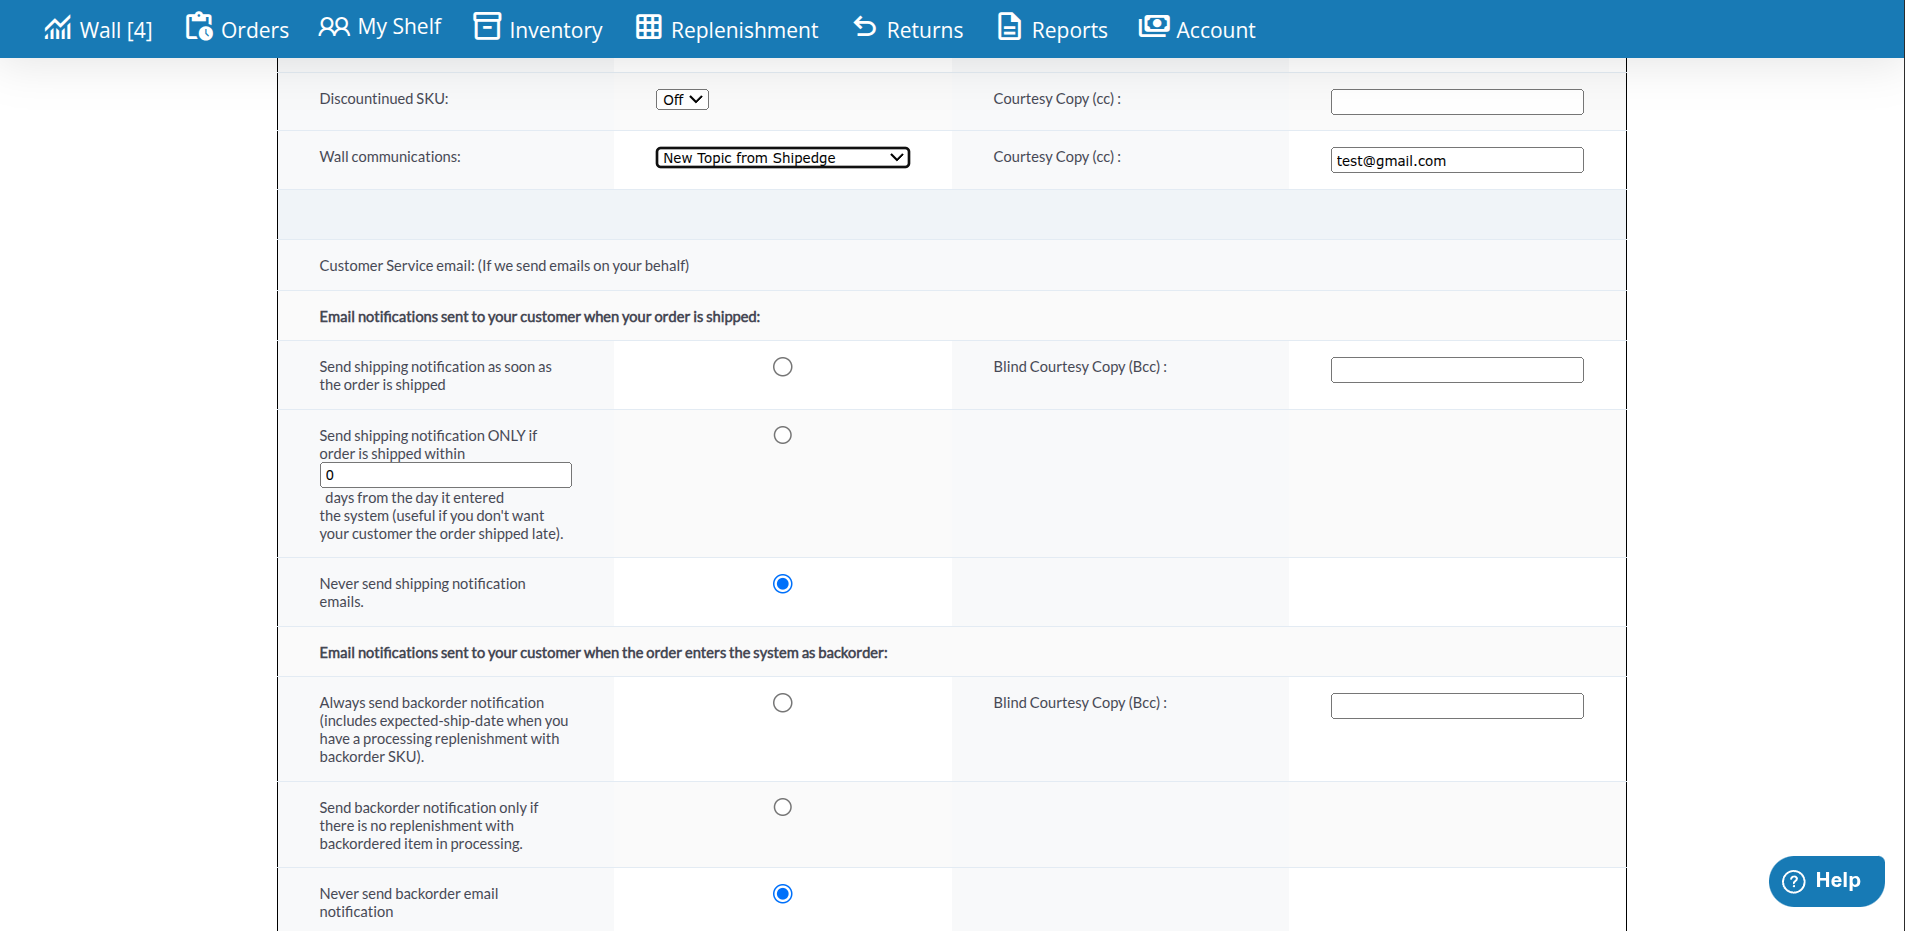
Purpose: Configure email notification preferences and communication settings.
Email Notification Types:
- Replenishment: Notifications when inventory needs replenishment
- Created SKU: Alerts when warehouse creates a new SKU in your inventory
- Return by Carrier: Notifications about carrier returns
- Restocking: Alerts about restocking activities
- Low Inventory: Warnings when inventory levels are low
- Order Shipped: Customer notifications when orders are shipped
- Backorder Notifications: Alerts about backorder status
Configuration Options:
- Enable or disable each notification type
- Set recipient email addresses
- Configure CC (Courtesy Copy) recipients
- Configure BCC (Blind Courtesy Copy) for order shipped notifications
- Set order shipped notification timing (days from order entry)
- Configure wall communications preferences
Order Shipped Notification Options:
- Always send shipping notification emails
- Send only if order is shipped within X days from entry
- Never send shipping notification emails
Wall Communications Options:
- Off
- New Topic from Shipedge
- New Topic or Reply from Shipedge
- New Topic or Reply from anyone
Default Email Address: All emails are sent to your account’s default email address. You can edit this address or change it in Communication Templates.
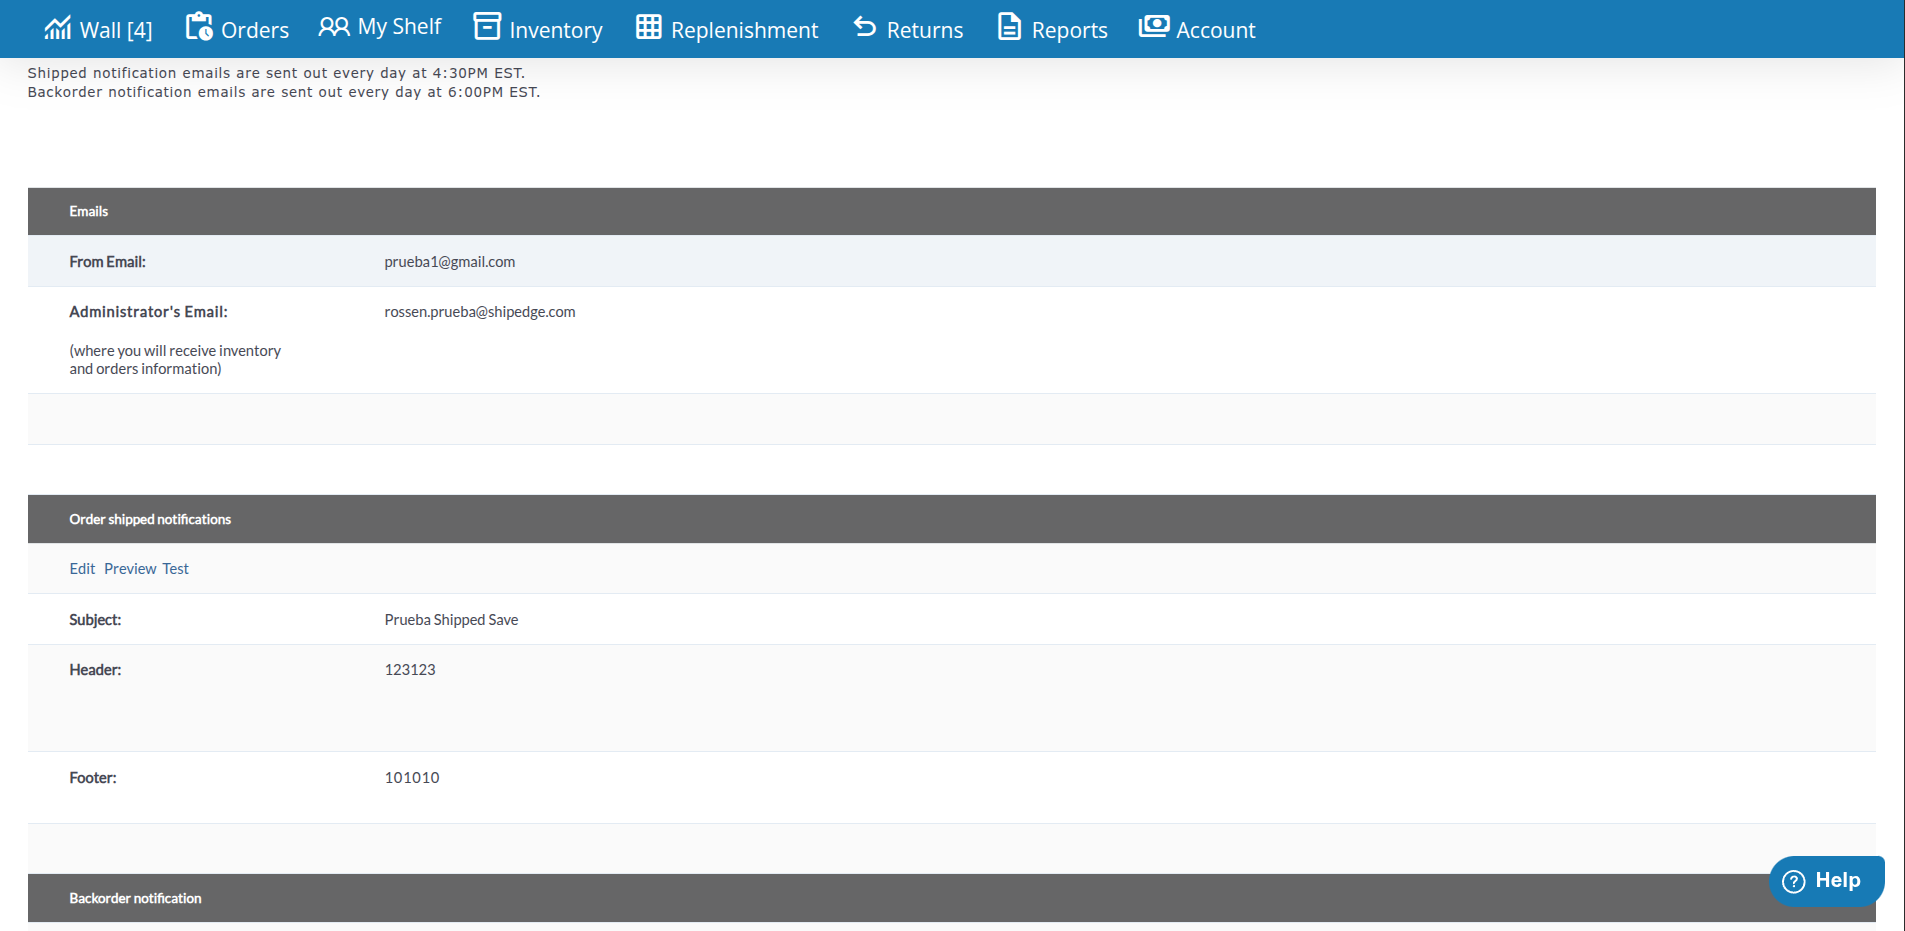
Purpose: Customize email templates for customer communications.
Template Types:
- Order Shipped notifications
- Backorder Shipped notifications
- Return Label emails
- Other automated communications
Template Configuration:
- Email Description: What the email is for
- Recipient: Who receives the email
- Reply To: Email address for replies
- Subject: Email subject line
- Footer: Footer text for emails
- On/Off: Enable or disable the template
Scheduling:
- Shipped notification emails are sent daily at 4:30 PM EST
- Backorder notification emails are sent daily at 6:00 PM EST
How to Edit Templates:
- Navigate to Communication Templates tab
- Find the template you want to edit
- Click Edit or click on the template row
- Update subject, footer, or other settings
- Click Save to apply changes
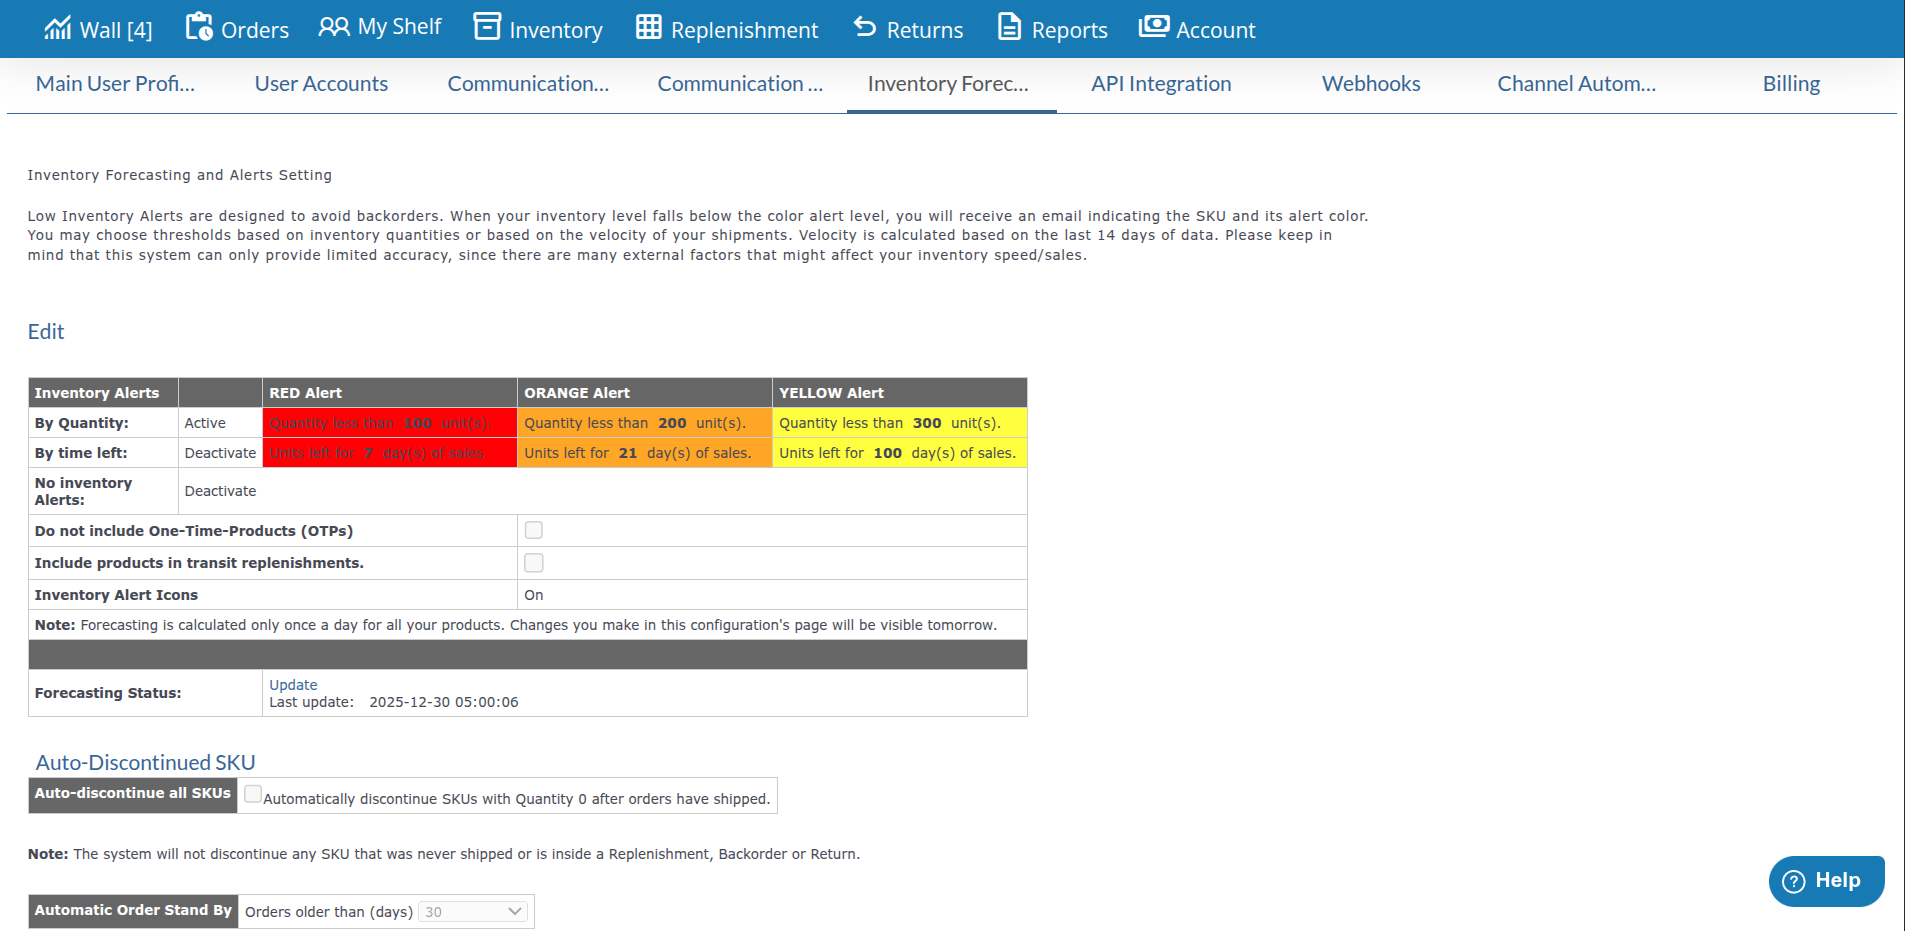
Purpose: Configure inventory alerts and forecasting preferences.
Alert Types:
- Quantity-based alerts
- Time-based alerts
- Low inventory warnings
- Replenishment notifications
Alert Configuration:
- Set alert thresholds
- Configure alert colors (Yellow, Orange, Red)
- Set time-based alert triggers
- Configure alert recipients
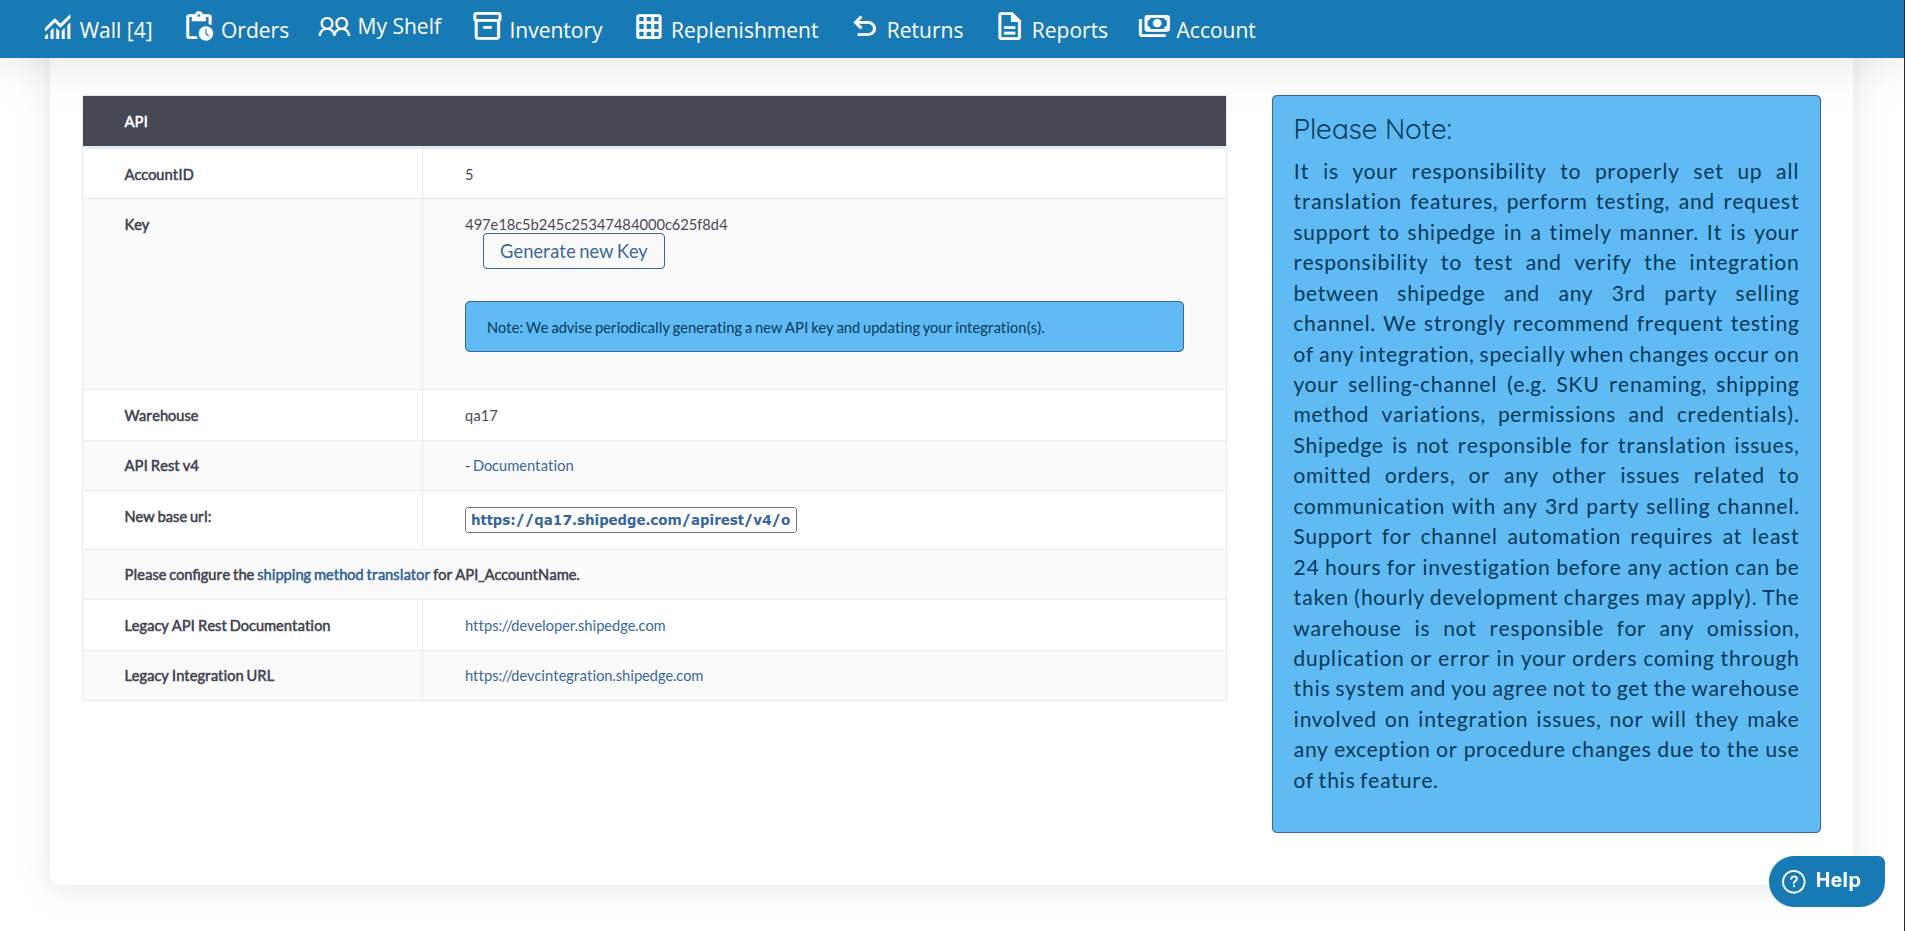
Purpose: Configure API access and integration settings.
Features:
- API key management
- Integration configuration
- API endpoint settings
- Authentication settings
More Information: See API documentation for detailed integration guides.
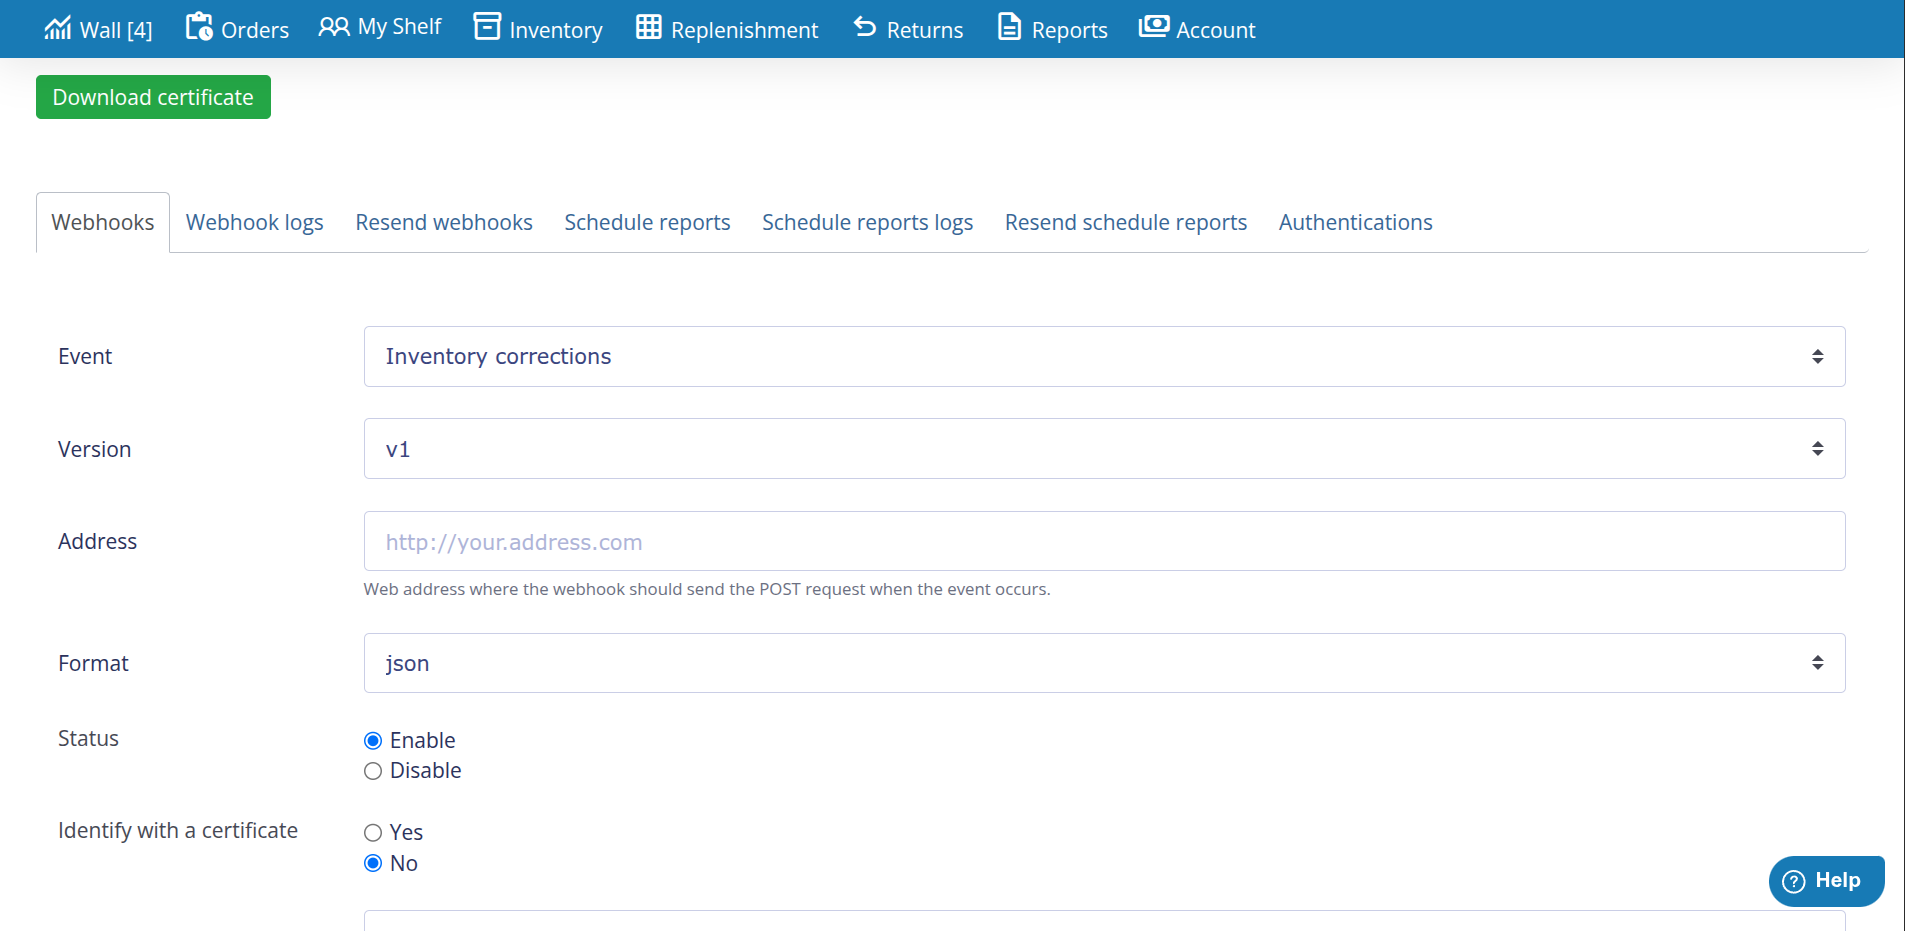
Purpose: Configure webhook endpoints for real-time event notifications. Webhooks send POST requests to your specified URL when specific events occur in your ShipEdge account.
Available Tabs:
- Webhooks: Create and configure webhook endpoints
- Webhook logs: View webhook delivery history and status
- Resend webhooks: Manually resend failed webhook notifications
- Schedule reports: Configure scheduled report webhooks
- Schedule reports logs: View scheduled report delivery history
- Resend schedule reports: Manually resend failed scheduled reports
- Authentications: Manage webhook authentication settings
Configuration Fields:
-
Event: Select the event that triggers the webhook
- Inventory corrections
- Inventory mirror
- Order any status change
- Order backorder, etc.
-
Version: Select the webhook version (v1, v2, etc.) for the selected event
-
Address: Enter the web address where the webhook should send the POST request when the event occurs
- Format:
http://your.address.com or https://your.address.com
- This is the endpoint URL that will receive webhook notifications
-
Format: Select the data format for webhook payloads
-
Status: Enable or disable the webhook
- Enable: Webhook is active and will send notifications
- Disable: Webhook is inactive and will not send notifications
-
Identify with a certificate: Choose whether to use certificate-based authentication
- Yes: Use SSL certificate for secure webhook delivery
- No: Standard HTTP/HTTPS delivery without certificate authentication
Additional Features:
- Download certificate: Download SSL certificate for secure webhook authentication
- Character encoding: Configure character encoding for webhook payloads (none, ASCII, UTF-8, Windows-1252, CP1256)
- Event-specific filters: Some events support additional filters (e.g., shipping methods, order types, stores)
Use Cases:
- Real-time order status updates to external systems
- Inventory change notifications for warehouse management
- Shipping status updates for customer notifications
- Replenishment alerts for procurement systems
- Return order notifications for return processing systems
- Event-driven integrations with third-party platforms
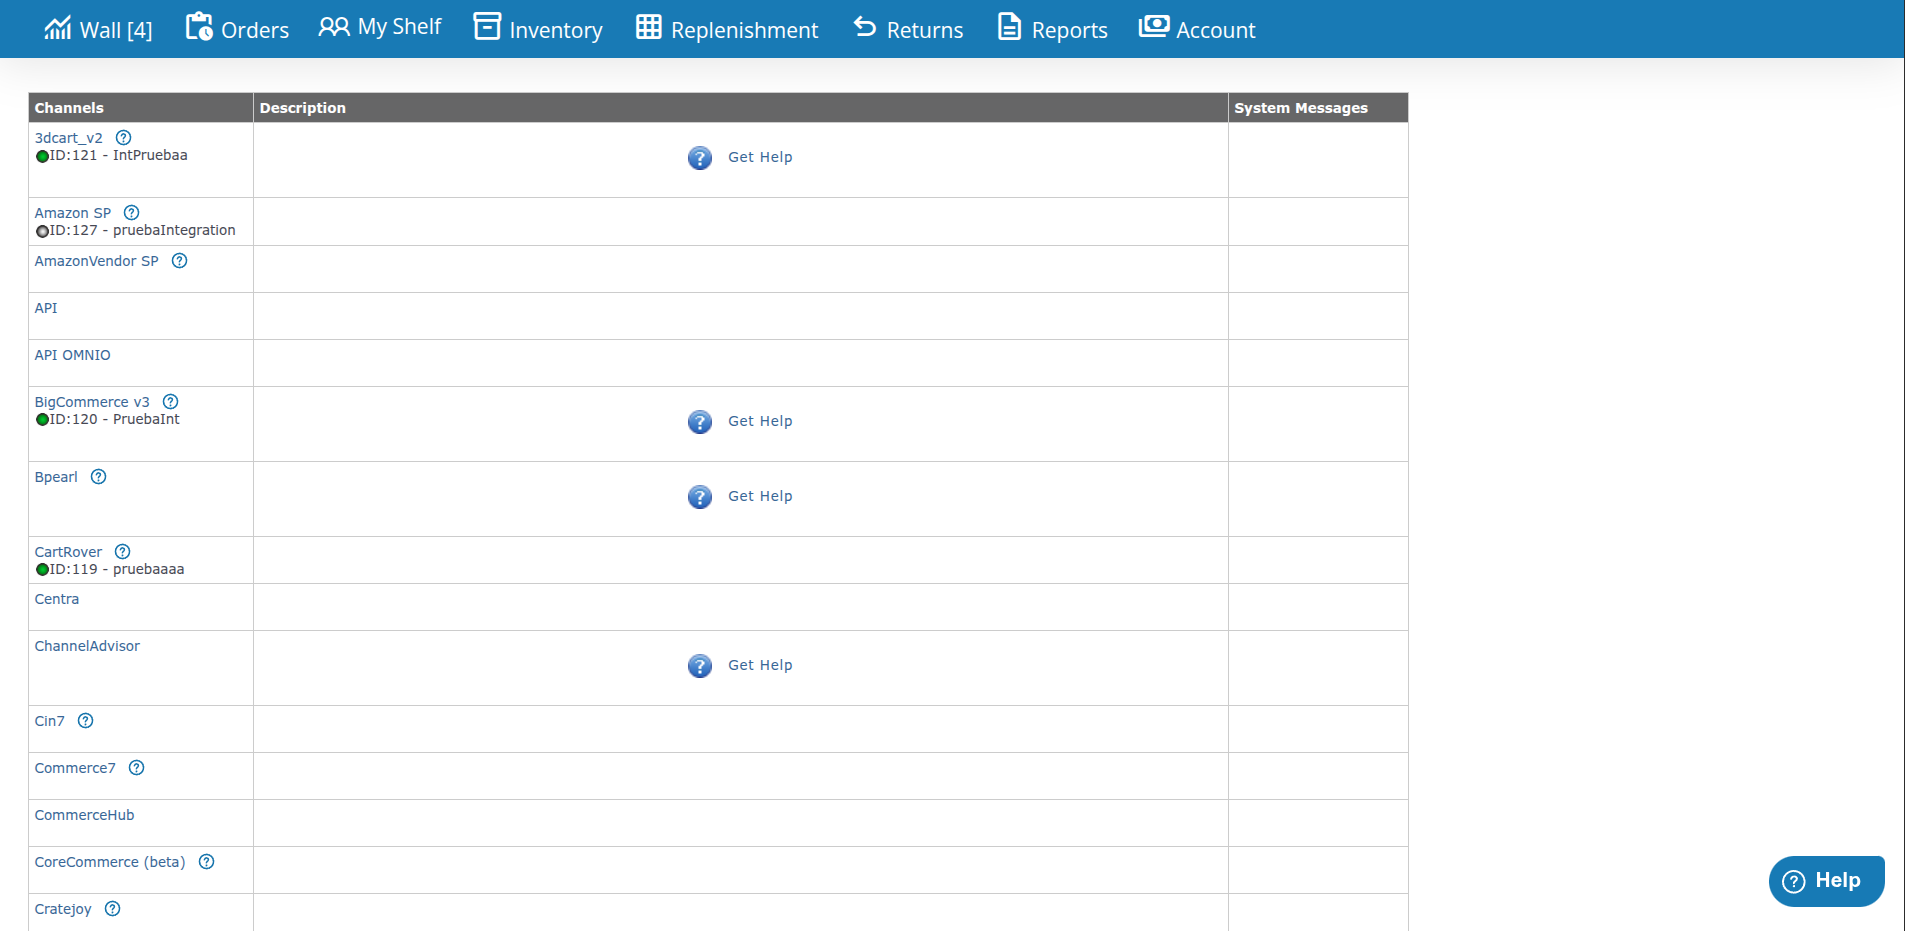
Purpose: Configure automated workflows for sales channels.
Features:
- Channel-specific automation rules
- Inventory sync settings
- Order processing automation
- Channel-specific preferences
More Information: See Channel Automation documentation for detailed configuration.
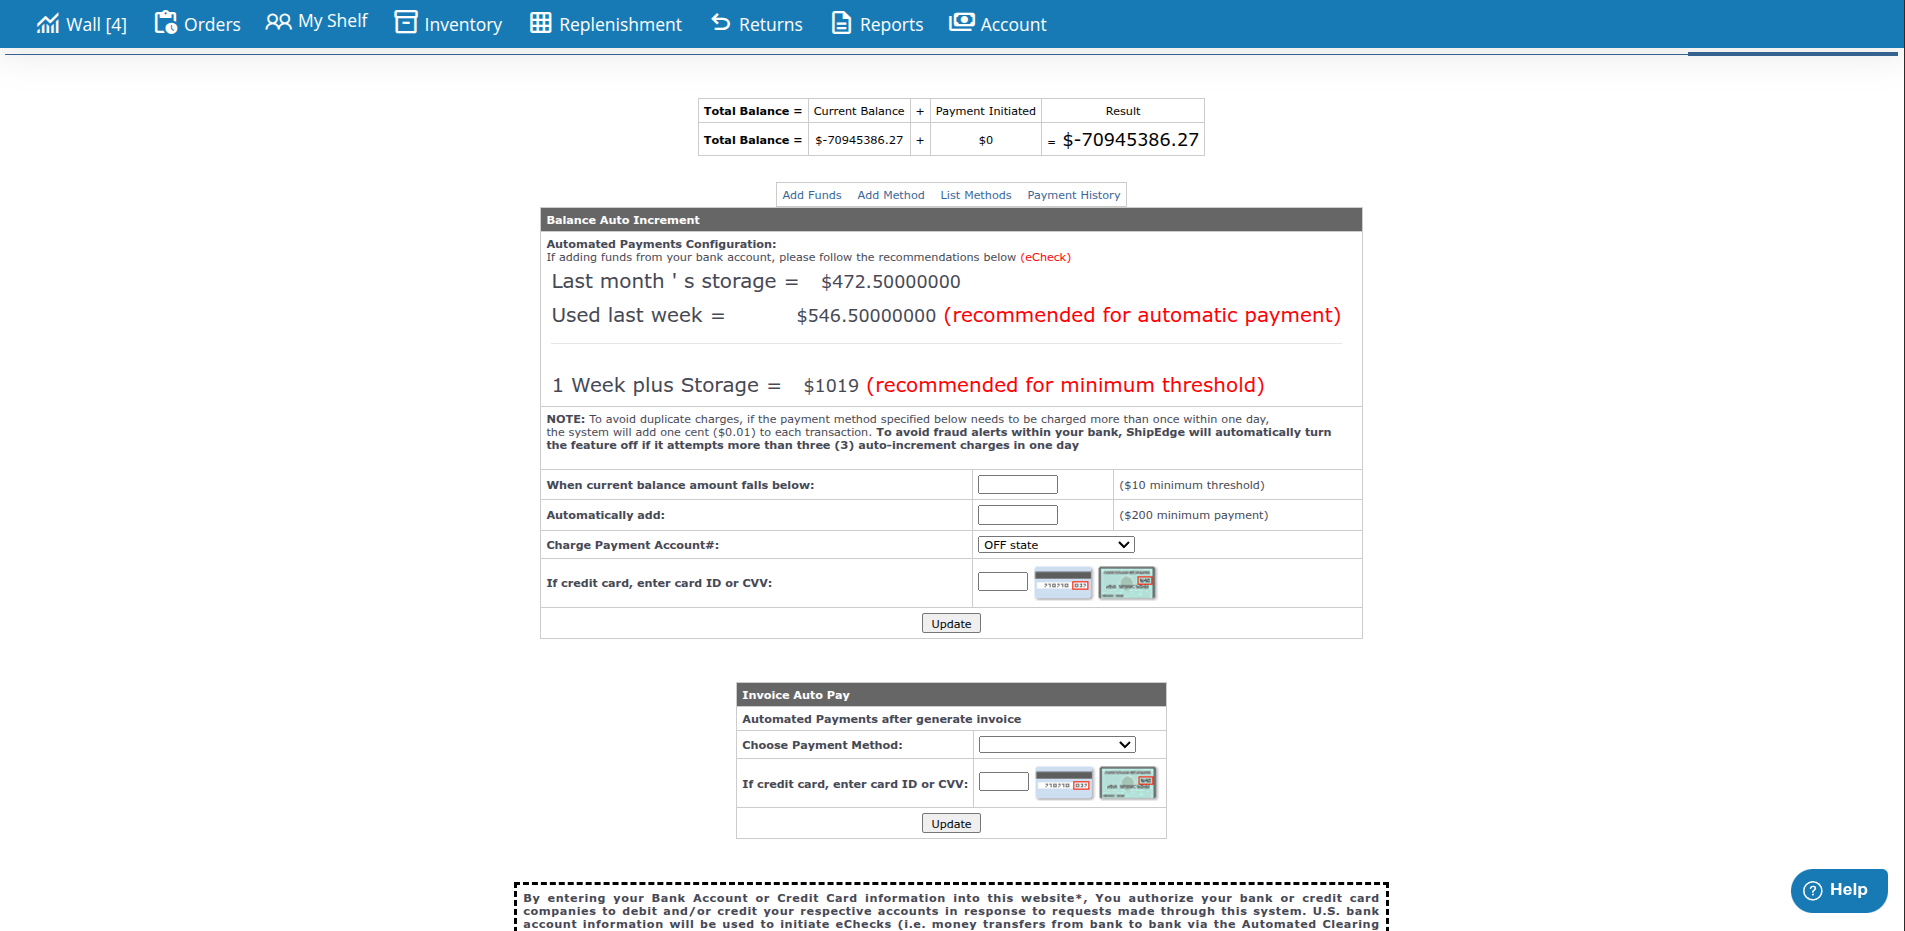
Purpose: Configure billing and payment preferences (if enabled for your account).
Features:
- Payment method settings
- Billing address configuration
- Invoice preferences
- Payment automation settings
Note: Billing tab is only visible if billing features are enabled for your account.
-
Navigate to Communications Settings
Click the Communications Settings tab in Preferences.
-
Review Current Settings
View your current email notification settings. Each notification type shows:
- Whether it’s enabled
- Recipient email address
- CC email addresses (if configured)
-
Edit Settings
Click EDIT button to modify settings.
-
Configure Notifications
For each notification type:
- Enable or disable the notification
- Set recipient email address
- Add CC recipients if needed
- Configure special settings (like order shipped timing)
-
Save Changes
Click Save to apply your changes. Email notifications will use your new settings immediately.
-
Navigate to Communication Templates
Click the Communication Templates tab in Preferences.
-
View Templates
See a list of all available email templates with their current configuration.
-
Edit a Template
Click Edit or click on a template row to modify:
- Subject line
- Footer text
- Reply To address
- Enable/disable status
-
Save Template
Click Save to apply changes. Templates are used for automated emails sent to customers.
Set up your email notification preferences when first setting up your account. This ensures you receive important alerts from the start.
Add team members as CC recipients for important notifications like order shipped or low inventory alerts. This keeps everyone informed.
Personalize your communication templates with your company branding and tone. This creates a consistent customer experience.
Periodically review your preferences to ensure settings match your current business needs. Update as your processes change.
After configuring webhooks, test them to ensure they’re working correctly. This prevents missing important real-time updates.
When adding users, clearly document what permissions each user has. This helps with security and troubleshooting later.
Preferences Option Not Visible
- Preferences is only available to account owners (User Type 1)
- If you’re an account owner and don’t see it, contact ShipEdge support
- Check that you’re logged in with the correct account
Email Notifications Not Working
- Verify email addresses are correct in Communications Settings
- Check that notifications are enabled (On/Off toggle)
- Ensure your account’s default email address is valid
- Check spam/junk folders for test emails
Template Changes Not Appearing
- Wait a few minutes for changes to take effect
- Clear your browser cache and refresh
- Verify you clicked Save after making changes
- Check that the template is enabled (On/Off status)
Cannot Edit User Accounts
- Ensure you’re logged in as an account owner (User Type 1)
- Check that you have permission to manage users
- Verify the user account exists and is active
- Contact support if permissions seem incorrect
Webhooks Not Firing
- Verify webhook URL is correct and accessible from the internet
- Check webhook status is set to Enable (not Disable)
- Verify the selected event actually occurred in your system
- Check the Webhook logs tab to see delivery attempts and error messages
- Test your webhook endpoint manually using a POST request tool
- Ensure your server can receive POST requests on the specified URL
- Check if certificate authentication is required and properly configured
- Verify character encoding settings match your endpoint’s expectations
- Review event-specific filters (shipping methods, order types) that might prevent webhook firing
API Integration Issues
- Verify API keys are correct
- Check API endpoint URLs
- Review API documentation for required parameters
- Test API calls using API testing tools
- Contact support if integration continues to fail
Settings Not Saving
- Ensure all required fields are filled
- Check for validation errors (red text)
- Verify you have permission to change settings
- Try refreshing the page and saving again
- Clear browser cache if issues persist
Account Management:
Communication:
Integration: