Skip to content

Carrier Packages

Carrier Packages is a tool that allows you to manage packages specific to each carrier in your system. From this view you can add new packages for specific carriers, edit existing configurations, and upload multiple packages from CSV files.

Each package includes detailed information such as external and internal dimensions, maximum weight, package type, and API codes needed for integrations with carrier systems.


Carrier-Specific Packages

Configure packages specific to each carrier. Different carriers can have different sizes and types of packages available.

Complete Dimensions

Define external and internal dimensions for each package. This enables accurate packing and shipping cost calculations.

Bulk Upload from CSV

Upload multiple packages at once using CSV files. Save time when you need to configure many packages.

API Codes

Assign specific API codes for each package. This facilitates integration with external carrier systems.

Centralized Management

Keep all carrier packages organized in a single view. Easy to search, edit, and maintain.

Package Types

Configure different package types (Box, Envelope, Pallet, etc.) according to each carrier’s needs.


  1. Navigate to Carrier Packages

    Access /addCarrierPackage.php directly or search for “Add Carrier Package” in the navigation menu.

  2. Verify your permissions

    Make sure you have Order_List_Processing_A level permissions with list capability. If you don’t have permissions, you’ll be redirected to login.


The page automatically displays all configured carrier packages in a DataTable with the following columns:
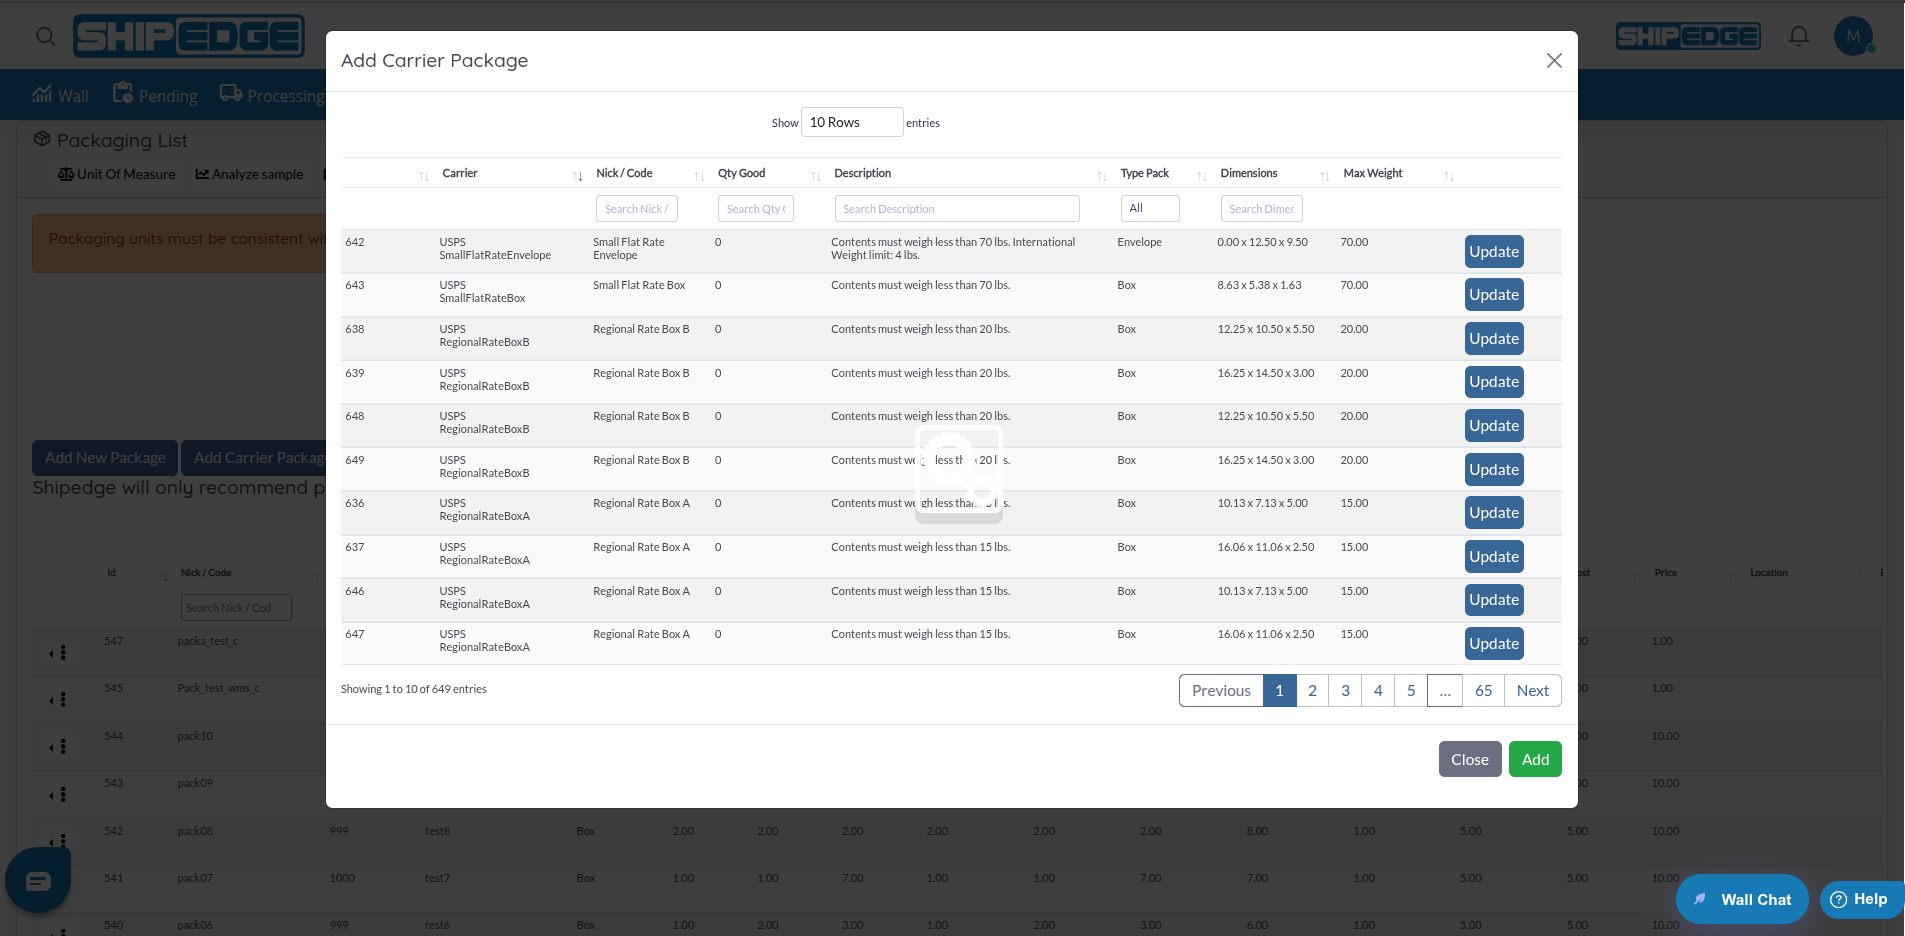
  • Id: Unique package ID
  • Nick: Short name or package identifier
  • Description: Detailed package description
  • TypePackID: Package type (Box, Envelope, Pallet, etc.)
  • Length: External length of the package
  • Width: External width of the package
  • Height: External height of the package
  • InnerLength: Internal length of the package
  • InnerWidth: Internal width of the package
  • InnerHeight: Internal height of the package
  • MaxWeight: Maximum weight the package can contain
  • ShippingCarrierId: Name of associated carrier
  • ApiCode: API code for integrations

Packages are added primarily through bulk upload from CSV files. This is the most efficient way to add multiple packages at once.

To add individual packages, you can use the CSV upload function with a file containing a single package, or contact the administrator to add packages directly in the database.

  1. Click Edit

    In the row of the package you want to edit, click the “Edit” button.

  2. Modal opens with existing data

    The modal will automatically fill with the package’s current information.

  3. Modify the fields you need

    Change any field: dimensions, maximum weight, description, carrier, API code, etc.

  4. Save changes

    Click “Update” to save changes.

  5. Confirm result

    The modal will close and the table will update showing the changes.

  1. Click Upload Carrier Package

    At the top of the page, click the “Upload Carrier Package” button.

  2. Upload modal opens

    A modal will appear with a field to select file.

  3. Prepare your CSV file

    Make sure your CSV file has the following columns:

    • Nick: Short package name
    • Description: Description
    • TypePackID: Package type ID
    • Length: External length
    • Width: External width
    • Height: External height
    • InnerLength: Internal length
    • InnerWidth: Internal width
    • InnerHeight: Internal height
    • MaxWeight: Maximum weight
    • shipping_carrier_id: Carrier ID
    • APICODE: API code
  4. Select the file

    Click “Choose file” and select your CSV file.

  5. Upload the file

    Click “Upload” to process the file.

  6. Confirm result

    You’ll see a confirmation message indicating if the upload was successful. The table will automatically update with new packages.

The DataTable includes search and filtering functionality:

  • Global search: Use the search field at the top of the table to search across all columns
  • Column filters: Some columns may have individual filters
  • Sorting: Click column headers to sort
  1. Use the dropdown menu

    At the bottom of the table, you’ll find a “lengthMenu” dropdown with options.

  2. Select how many records to view

    You can choose between 20, 30, or 100 records per page.


Available package types include:

  • Box: Boxes with internal and external dimensions
  • Envelope: Envelopes (uses volume instead of internal dimensions)
  • Pallet: Pallets (uses volume instead of internal dimensions)
  • No-Box: No box (uses volume instead of internal dimensions)

Package type determines which fields are relevant:

  • Box: Requires internal dimensions (InnerLength, InnerWidth, InnerHeight)
  • Envelope, Pallet, No-Box: Use volume (volumeCapacity) instead of internal dimensions

External dimensions define the total package size:

  • Length: External length (in configured unit)
  • Width: External width
  • Height: External height

These dimensions are used to calculate total package volume and determine if products fit.

Internal dimensions define available space inside the package:

  • InnerLength: Available internal length
  • InnerWidth: Available internal width
  • InnerHeight: Available internal height

These dimensions are used for accurate packing calculations, especially for “Box” package types.

The MaxWeight field defines the maximum weight the package can contain:

  • Used to validate that products don’t exceed package capacity
  • Considered along with dimensions to select the correct package
  • Must be greater than the weight of products to be packed

The APICODE field stores identification codes for integrations:

  • Useful for systems that connect with carrier APIs
  • Can be any code or identifier needed
  • Used to identify the package in external systems

Each package is associated with a specific carrier via shipping_carrier_id:

  • Allows having different packages for different carriers
  • System can filter available packages based on selected carrier
  • Facilitates management when different carriers have different package options

The CSV file must have these columns (in order):

  1. Nick: Short package name
  2. Description: Description
  3. TypePackID: Numeric package type ID
  4. Length: External length
  5. Width: External width
  6. Height: External height
  7. InnerLength: Internal length
  8. InnerWidth: Internal width
  9. InnerHeight: Internal height
  10. MaxWeight: Maximum weight
  11. shipping_carrier_id: Numeric carrier ID
  12. APICODE: API code

Default values for optional fields are:

  • BoxWeight: 0
  • Cost: 0
  • Price: 0
  • volumeCapacity: 0

To use Carrier Packages you need:

  • Permission level: Order_List_Processing_A
  • List capability: CanList() - To view the list
  • Edit capability: Implied for adding and editing packages

If you don’t have these permissions, you’ll see messages indicating you don’t have the necessary rights.


Use Descriptive Names

Use clear and descriptive package names (Nick). This facilitates quick identification when selecting packages for shipments.

Measure Precisely

Make sure dimensions are accurate. Incorrect dimensions can cause problems in packing and cost calculations.

Consider Internal Dimensions

For Box type packages, carefully measure internal dimensions. These are critical for accurate packing calculations.

Configure Correct Maximum Weight

Set maximum weight based on actual package specifications. This prevents overloading and shipping problems.

Use CSV for Bulk Upload

If you need to add many packages, use the CSV upload function. It’s much faster than adding packages one by one.

Keep API Codes Updated

If you use integrations with carrier APIs, keep API codes updated. This ensures integrations work correctly.


Problem: The “Edit” button doesn’t work or I can’t save the package.

Solutions:

  1. Verify that you have Order_List_Processing_A level permissions
  2. Verify that all required fields are complete
  3. Make sure to select valid TypePackID and shipping_carrier_id
  4. Verify that numeric values are valid (dimensions and weight)
  5. Review error messages in the browser console
  6. Reload the page and try again

Problem: The CSV file is rejected or data doesn’t save correctly.

Solutions:

  1. Verify that the file has all required columns
  2. Make sure the CSV format is correct (comma-separated)
  3. Verify that numeric values are valid
  4. Make sure IDs (TypePackID, shipping_carrier_id) exist in the system
  5. Review the specific error message that appears
  6. Try with a smaller file first to verify the format

Problem: Entered dimensions don’t save or save with incorrect values.

Solutions:

  1. Verify that values are valid numbers
  2. Make sure to use the correct format (decimals with period, not comma)
  3. Verify that dimensions are not negative
  4. For Box types, make sure to enter internal dimensions
  5. For Envelope/Pallet/No-Box types, verify that you use volumeCapacity instead of internal dimensions

Problem: The carrier dropdown is empty or doesn’t load.

Solutions:

  1. Verify that you have carriers configured in Carriers List first
  2. Reload the page so carriers load
  3. Verify that you have permissions to view carriers
  4. Review the browser console for JavaScript errors
  5. Contact the administrator if the problem persists

Problem: The TypePackID dropdown is empty.

Solutions:

  1. Verify that package types are configured in the system
  2. Reload the page so types load
  3. Review the browser console for JavaScript errors
  4. Contact the administrator if the problem persists

Problem: The table is empty or doesn’t show packages I added.

Solutions:

  1. Verify that packages were saved correctly (review confirmation messages)
  2. Reload the table using the refresh button if available
  3. Verify that you don’t have active filters hiding packages
  4. Verify that you have permissions to view packages
  5. Review the browser console for data loading errors

Problem: After saving, the modal remains open.

Solutions:

  1. This may be normal if there’s an error - review error messages
  2. Try closing the modal manually by clicking outside it or on “Close”
  3. Reload the page if the modal doesn’t respond
  4. Verify that the operation completed correctly by reviewing the table

Next Steps: